

Hello fellow crafters!
Ready to learn a SUPER easy granny square? Most crochet addicts start their addiction with the simple (yet attractive!) granny square. You can make practically anything out of squares; blankets, bags, pillows, even clothes!
Not only are they extremely versatile, but a huge variety of granny squares only require basic stitches which is why they are the perfect project to boost a beginner’s confidence!
This particular square is called a solid granny square because of the simple fact that it barely has any holes which you can see through. That is why it is the perfect square for clothes or bags without needing to add a liner to your finished project!
Secret codes you will need to know 😉
DC = double crochet ch = chain stitch
Grab your yarn and your hook and let’s begin the Simple Solid Granny Square!
First off, you will need to make a magic circle! It’s very simple and ensures that the center of your granny square will not have a hole (don’t forget we are making a SOLID granny square!)


Start by wrapping your yarn around your finger 3 times.
Slide your hook under the first two loops. Hook onto the third loop and pull it through the first two loops.
Gently slide the loops off of your finger and create one slip stitch.
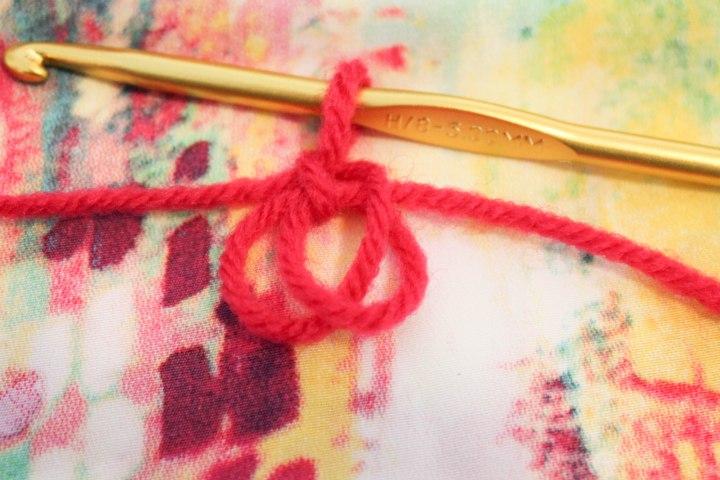
You just made a magic circle! Now we start making our granny square.

**This chain 3 will count as one DC and 1 chain stitch**
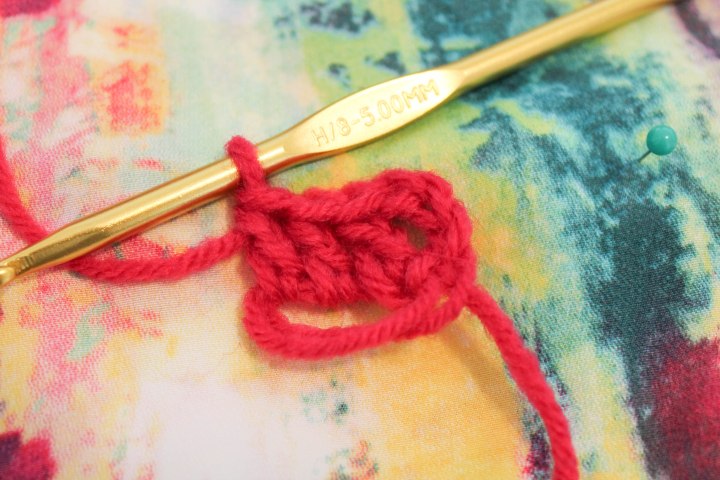
The green dots indicate where your chain 1 spaces should be.

Now the first round of your granny square is complete but we still need to close the magic circle.
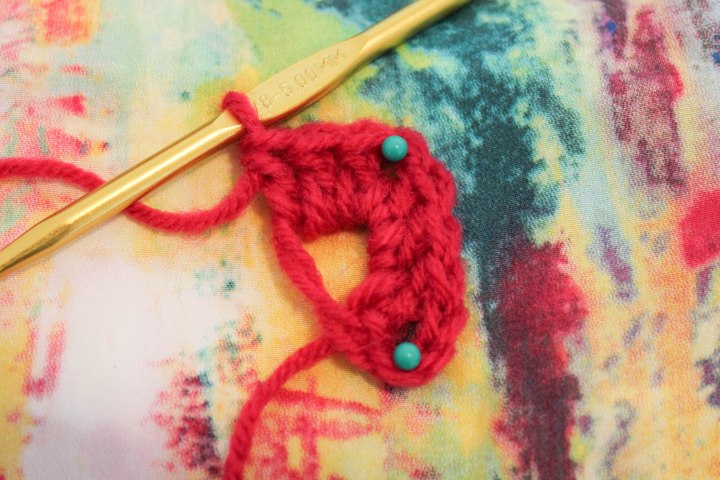
To close the magic circle:


Pull the loose end of your yarn (first photo). One of the two loops of your magic circle will start to tighten. Grab that loop! Pull on it until the other loop disappears (second photo).
Then pull the loose end of the yarn that you pulled in the first step until the center of your circle is completely closed!
That’s it!

**3rd chain stitch is marked with a white dot**

ROUND 2
Time to start the second round! Don’t worry, if you figured out the magic circle then the rest of this pattern will be a breeze!


Now you are at the corner space. In each corner you will need to (2DC, CH1, 2DC)
Continue around. DC into the top of each DC stitch and repeat the corner pattern from above whenever you reach a corner!

That’s how you complete the simple solid granny square!
Now you can use this granny square however you would like. It is a continuous pattern so you can make it as big or as small as you would like by just adding more rounds!
I would love to hear about your super simple granny square projects in the comments below!
Happy Crafting!

Pingback: Easy Granny Square Tank Top - MatayaMade
Pingback: Crochet Dreamcatcher - MatayaMade