Crochet Tutorials and Project Inspiration


Receive MatayaMade's newsletter packed with tutorials, handcrafted ideas and FREE giveaways! Newsletter subscribers also have unlimited access to the Members Page Sign me up!


Hello crafters, today I am sharing my one hour beanie pattern with you, you’re welcome 🙂 I created this pattern so that I could gift many cozy beanies for Christmas. I love these hats because they work up so quickly and are very warm due to the fact that they use bulky yarn.
This pattern is a ‘one size fits all’ adult size hat. The style of the hat is very versatile as you can fold the brim however you would like or not fold it at all to make a longer beanie
If you would like to make this beanie with another type of yarn it is totally doable! To ensure that you get the same size beanie you need to make sure that your foundation row is 11″ long and then work the pattern until your piece measures 22″. Then proceed to the finishing steps below.
Foundation half double crochet 25 stitches.
Rows 9 – 14 (repeat rows 3-8)
Rows 15 – 20 (repeat rows 3-8)
Rows 21-26 (repeat rows 3-8)
27. ch2(counts as hdc) hdcBLO into next stitch and each stitch across (25hdc)
28. ch2(counts as hdc) hdcFLO into next stitch and each stitch across (25hdc)
29. ch2(counts as hdc) hdcBLO into next stitch and each stitch across (25hdc)
Fold the sides of your beanie together with the inside of the hat facing outwards. The picture below shows the outside of the beanie. Note that the different rows give texture to the pattern whereas the inside of the beanie is a more uniform pattern without the obvious ridges.

Join up the side of your rectangle by slip stitching into the outer loops of each edge.

Chain 1. Work a row of single crochet around the bottom edge of the beanie. Ideally you want to work one single crochet into the edge of each row. It can be a little bit difficult to see the edges of your rows so don’t be too hard on yourself if you have one stitch extra or one stitch less somewhere along the line.

If you have a long yarn tail at the top of your hat you can use that to tie up the top of your beanie. If you didn’t leave a long tail you can simply slip stitch a new piece of yarn to any stitch along the top edge.
Slip your yarn onto a yarn needle and weave in and out of each stitch around the top of the beanie. Pull yarn tight to cinch the top of your beanie closed and then tie off securely. Weave tail into the rest of the beanie until it disappears.

I hope you have enjoyed this tutorial! Please comment below or shoot me an email if you have any questions, comments or concerns. I would also love to see your completed beanie hats in my email inbox, on Facebook (@Matayamade) or on Instagram (@MatayaMade)
Happy crafting,


Hello crafters,
I have a new pattern to share with all the pet parents today! This tutorial will show you how to crochet your own pet bandana in a size that fits your fur baby. I have created this pattern for small, medium and large dog sizing but this pattern is fairly simple so it will be easy to adjust to fit any size (or species!) of pet. If you are more of a seamstress than a crocheter you can check out my pet bandana tutorial which uses a sewing machine and cute fabric 🙂
Grab your pet and let’s get to it!

I used Off White for the main colour and made my stripes in Pinky Stripes, Crown Jewels and Golden Mist.
To make your crochet pet bandana you will need to figure out the neck size of your pet. If you have your pet handy you can simply measure around the neck wherever you would like your bandana to sit. If your pet isn’t around or if you are making this for a gift you can refer to the chart below for a helpful estimate of neck sizes.
These are average / rough measurements to help you guesstimate the right size bandana for your project.

If you do know your pet’s neck size you can simply add 20″ to that measurement to determine how long to make your tie strip.
The first part to making your crochet pet bandana is to make the tie strip that will go around your pet’s neck.
For the start of your tie strip I would strongly recommend a foundation double crochet row as opposed to a chain row because this way you can get an accurate measurement as you crochet.
Attach your yarn on the end and chain 1.
Repeat on other end of tie strip.
You have now completed the tie portion of your pet bandana. Put it aside and lets move on to the triangle.
There are three sizes of triangle to choose from: small, medium and large.
I used the colours listed above to make my bandana but you can definitely get creative with your favourite colours. If you want to follow my colour scheme then use the colours as follows:
Main colour: off white
Colour A: pinky stripes
Colour B: crown jewels
Colour C: golden mist
*Note* If you are making a small bandana you will only need to use 2 different colours
Now you have completed a tie strip with a tassel on either end and a triangle with single crochet stitches around it. Attach another tassel in the bottom point of your triangle in the chain 2 space.
This photo shows how I pull thick tassels through a small stitch space! Cut a small piece of yarn to tie off the tassel, use that small piece to pull the tassel through the whole with your crochet hook.

Once you have pulled the tassel yarn through, tie it off with the piece of yarn that you used to pull it through the hole.

Now that the tassel is attached you can attach the bandana triangle to the tie strap. Start by finding the middle of your tie strip (fold it in half and and find the center stitch). Attach the center of the tie to the center of the bandana triangle, I used a bobby pin.

Next, fold the tie strap forward so that the stitches of the tie strip line up with the edge of the triangle.


You have a couple of different options for connecting the two pieces. I prefer to slip stitch in the outer loops only which creates a join that looks like this:

If you slip stitch through all 4 loops then your join will look more like this:

Whichever method you use remember to keep your slip stitches loose so that the join lies flat when you are finished.
Tie off your yarn and weave in all of your ends.
I hope you have enjoyed this tutorial 🙂 If you have any questions or comments I would love to hear from you either in the comments below or at Mataya@matayamade.com
Happy crafting,

This tutorial will show you how to crochet a heart-shaped stitch. I had seen cute heart blankets in a few different places but wasn’t able to find any patterns or tutorials for making a heart shape within your regular crochet row. I experimented with a variety of different stitches and combinations until I finally came up with this tutorial. The hearts are small and puff out slightly which I think is very cute <3

I chose to make a baby blanket with this stitch and will share the details of that pattern throughout the tutorial. However, feel free to get creative with this heart stitch technique to make anything that you would like. I would love to see how you have used my heart stitch in your own projects and would be really happy to see your projects tagged with @matayamade or added to the comments below 🙂
*Finished baby blanket size using these supplies is 32 inches (81cm) square.
Start your blanket with one row of 110 foundation single crochet stitches. (If you would prefer, you can just chain 110 and then single crochet into each chain.)
I like to use a bigger hook size for my first row so that it is easier to work my next row into it. In this case I used a 5.5mm for my foundation row and a 5mm for the rest of the blanket.
Use Vintage Indigo colour unless otherwise indicated.
The heart rows are worked in two different colours. If you haven’t worked with multiple colours at once you can see my tutorial for that here.
To start your blanket border attach the vintage indigo yarn and sc around, working 1 st into the side of each hdc stitch on the side of the blanket. Corner: (1sc, ch 1, 1sc)

I hope you love this tutorial and are able to create your own heart crochet project with it. If you need help with any part of this tutorial feel free to comment below or shoot me a message / email. I love to hear from my fellow crafters!

If you can post your finished heart stitch projects either on Instagram @matayamade or in the comments below I would love to see how your heart stitch projects turned out 🙂
Happy crafting!

Hello crafters!
Today I am here to share another free pattern with you 🙂 This time it is a trend that has been sweeping through the crochet community! That’s right; the pocket shawl! I love the concept of a pocket shawl, it is all the coziness of a homemade shawl with the always desirable addition of pockets!
This one in particular has ribbed edges, deep cozy pockets and a glittery fringe edging to bring it all together. I had been brainstorming projects that I could make with my Lion Brand Shawl in a Ball yarn and I was having a bit of trouble finding the perfect project.

I attempted a summer top but ended up frogging the whole thing when it was just a sleeve away from being finished 🙁 I think my issue with the yarn is that it has a lot going on and can kind of overwhelm the project. Not to worry though; this project is the perfect match for shawl yarn. I used a neutral gray for the majority of the shawl and then I used shawl in a ball for accent rows and fringe. I love the end result. The grey makes the shawl yarn pop and doesn’t overpower the look of the project.
In conclusion, I think that the shawl yarn is perfect when blended with other yarns in your projects!

Now let’s continue on with the pattern!
Grey yarn: Chain 11.
Hdc in BLO each stitch across (10hdc)
Repeat for a total of 200 rows.
Turn your work so that you are working along the side of the ribbing. Chain 1. Single crochet into the side of each hdc row. (200sc)
4 – 17. Repeat rows 2 and 3
18. (Grey yarn) Chain 1. Single crochet into each stitch across.
Now you will turn your work to finish the second side of the ribbing.
Chain 11. hdc back into the chain stitches that you just did, working into the back loops only (BLO). Once you work 10hdc stitches you will be back to the single crochet row of your shawl. Slip stitch into each of the next 2 single crochet stitches. *The first slip stitch will connect the end of your row to your shawl and the second slip stitch is considered the chain 1 for your next row.
Work 10hdc across, turn and chain 1. Continue this along the side of your shawl until you reach the end!
2- 11. repeat row 1.
12. (coloured yarn) Attach yarn into top of last stitch. Chain 1. hdc into each stitch across. Tie off.

Using a yarn needle and a single strand of grey yarn, do a simple mattress stitch to attach the edges of the pocket to your shawl.
I attached mine about two inches from the edge of the scarf and right along the ribbing on the sides. You could always try your scarf on to make sure this where you would like your pockets to sit.
To make your tassels you will need a comb or any item that you can wrap your yarn around. I used a comb that is six inches long. Using two strands of yarn (one of each colour) wrap around the comb four times.

Cut one end of the loops so that you have multiple strands that are double the length of the comb.

Using a crochet hook, pull your strands through the stitch on the edge of your shawl. Take two strands from the tassel and wrap around the entire bunch of yarn a few times and then tie a double knot.

Repeat along the edge of your pocket shawl. I put a tassel into the end of each colour row and four tassels along the ribbed part of the shawl on either side.
After I complete any project I like to run it through a wash and dry cycle before trimming any ends. Washing and drying softens up the yarn (especially in this case since I used a value yarn), it also settles everything into place so that I can trim the ends properly.
Most of my projects are gifts and it gives me peace of mind knowing that everyone will be able to wash their new treasures with the normal laundry and not have to worry about damaging them. I do usually recommend that crochet garments are put in a mesh bag for washing just so that they don’t get snagged on the other garments in the wash.

I hope you have fun with this pattern! I enjoyed creating this pocket shawl and have already started in on my second one with a different yarn combination 🙂

I would love to see your finished pocket shawls down in the comments below or you can tag @matayamade on Instagram or MatayaMade on Facebook 🙂
As always you can comment below or shoot me an email if you have questions about the pocket shawl pattern or just to say hi!
Happy crafting!

Hello crafters!
I am very excited about this tutorial 🙂 I have tried a few different amigurumi projects and they are super fun and rewarding. Here are a few of my past projects if you are looking for some good patterns!
Amigurumi Today’s Heart Giraffe

Pikachu from Sabrina’s Crochet


I noticed when looking for some yoda safety eyes that is is pretty difficult to find safety eyes in larger sizes, especially at an affordable price. I added some felt to my Yoda eyes to make them appear larger but it was pretty tricky.
For my Pikachu, I just made felt eyes which turned out well, but as I prepare to make my next project (an amigurumi dinosaur, which I will hopefully be posting a tutorial for!) I wish for an easier way to make eyes with supplies already on hand.
Enter: crochet eyeballs! I have written out a pattern for three different eye sizes which will hopefully help you out with your amigurumi projects 🙂
These eyes are made with a worsted weight yarn and a 5mm hook. The sizes are 2.5″, 3.5″ and 4.5″
The sizes of these eyes can be easily adjusted using different yarn weights and hook sizes. Whatever works with your pattern!
Using the tail of your white yarn and a yarn needle; weave a small line in the pupil of your eye to give it a bit of shine.

Optional: To make your eyes blend into your project you could also add a round of single crochet in the colour of your project. The bonus round would be as follows.
6. (2sc into first stitch, 1sc into next 4st) repeat around (36)
8. (2sc into first stitch, 1sc into next 6st) repeat around (48)
10. (2sc into first stitch, 1sc into next 8st) repeat around (60)
I know a lot of people (including myself) have problems with their crochet circles turning into crochet hexagons. Here are a few tips I have come across to keep those circles circular:
I hope this tutorial has helped you out! A one-page PDF download of my crochet eye pattern is available in my shop for just two bucks. If you want to donate to my yarn fund so I can keep creating I would truly appreciate it 🙂
Comment below with any questions or ideas. Feel free to share your completed amigurumi projects with crochet eyes, I would love to see them!
Happy crafting!

Hello crafters!
This one is for all of the cat parents out there! I personally am a dog mother but I have two cat nephews that are so adorable 🙂 I’m so excited about this project because it is very quick to whip up and it is also a great way to use up yarn scraps.
Side note, if you have an absurd amount of yarn scraps and want to connect them to make your own unique yarn ball, check out my scrap yarn ball tutorial to help you with that 🙂
Let’s get started!
Obviously if you want your catnip mouse to contain catnip you will need to mix some in with your stuffing! You can use regular polyfil to stuff your mouse but this is also a great oppourtunity to be creative. I used leftover yarn scraps to stuff mine. Since these catnip mice are so tiny they don’t need much to fill them up 🙂
I also have some catnip growing in my garden which is perfect for this project (homemade and homegrown, doesn’t get better than that!)

*Make 2*

The tail of your mouse is made with a few different strings. You can definitely get creative here with whatever you have on hand! I used mini pompoms threaded onto yarn, a strand of just chain stitches and a curly cue 🙂

To make the curly tail:
Chain 50. Turn and single crochet 3 into each stitch across.
Make magic circle. 6 single crochet into circle. Close circle. Join with slip stitch to first stitch.
2. 2 sc into each stitch around (12)
3. 1 sc, 2sc in next (18)
4. 2sc, 2sc in next (24)
5. sc in each stitch around (24)
6. sc in each stitch around (24)
7. sc in each stitch around (24) *At this point, attach the tail pieces. Using your yarn needle, thread all of your tail ends into the mouse butt.

Turn the mouse inside out and tie all of your ends into a knot.

Turn your mouse right side out and continue on with round 8!
8. 2sc, sc2tog (18)
9. sc in each stitch around (18)
10. 1sc, sc2tog (12)
11. sc in each stitch around (12) *At this point you can attach the ears. Pull the thread of each ear through to the inside of the mouse. Tie the ends of the two ears together in a knot. Leave the excess yarn poking out of the front of your mouse because we will use that for the whiskers!

12. Sc2tog around (6)
Tie off, leaving long tail. Stuff your mouse with your preferred stuffing (and your catnip). Using a yarn needle, weave through all six stitches and pull closed. Make sure that the end strings from your ears are coming out of the mouse before you tighten the hole closed.
At this point you should have something that looks like this:

Now for the eye and nose detail!
To make the eyes simply attach a strand of black yarn in each of the spots where you would like each of your eyes to be and tie a knot for each eye.
For some reason this picture give me creeps!

Then use a yarn needle or small crochet hook to pull the extra ends inside the mouse.
To finish off the nose I used a lightweight pink baby yarn. Using a needle, thread the pink yarn around the grey strands that you left poking out of your mouse. Continue to sew around the “whiskers” until you have a mouse nose!

I weaved my yarn around about six times and was satisfied with the look 🙂 Trim whiskers to desired length.

That’s all there is to it! If you feel like you need to spoil your cat just a little bit more you can check out my cat hammock tutorial 🙂

I would love to see your questions, comments (and cute cat pictures!) below.
Happy crafting!

Hello crafters!
Today I want to share my colourful crochet crown pattern with you! These crowns are quick to whip up and can be made in any size. I think these would be cute to make for a kid’s birthday party, but really any day could be a great occasion to wear a crown 🙂
This tutorial shows you how to make a crown for an 8-10 year old; size of 21″ or 53cm. For a complete printable pattern (that includes sizes newborn to 10 years) you can head over to my shop.
The instant download PDF pattern includes everything you need to know to make your crown, including stitch descriptions, size chart and patterns for 7 different sizes.
The few dollars from my pattern sales keep me stocked with tea and yarn so I can keep creating and sharing 🙂
This pattern includes one row that uses both colours. If you do not know how to change colour while crocheting check out my colour change tutorial for all the details 🙂
Dark Foundation single crochet 78 stitches.

Join to top of first single crochet to make a circle. Use tail to tie bottom of row in and weave in ends

Dark hdc into each stitch around (78)
Repeat round 2 (78)
Repeat round 2 (78)
Repeat round 2 (78)

Light sc into each space between the hdc from the previous round (78)

Dark hdc into each stitch around (78)

Chain 1. (dark 3hdc, light 3dc cluster) Repeat from ( to ) around. End with a hdc into each of the last 2 stitches (59 hdc, 19 clusters)

Dark hdc into each stitch around (78)

Repeat row 9 (78)

Dark [sc into 1st stitch. Skip 2 stitches. (4dc, ch3 picot, 4dc) into next. Skip 2 stitches] (13 points)

I hope you had a lot of fun with this pattern. Don’t forget to head over to my shop for the printable PDF of this pattern so you can make crowns for everyone you know! I would love to see your finished crowns down in the comments below or you can tag @matayamade on Instagram 🙂

Happy crafting!

Hello crafters!
Anyone who works with yarn has that scrap pile lurking in the corner with all the odds and ends that are too short to make anything from. My circumstances are a little more extreme than most as I made a VERY bad decision regarding my yarn stash.
I typically run all my yarn through the washer and dryer when I first purchase it so that it can do whatever shrinking or stretching that it plans to do BEFORE I turn it into it’s new self. One day while digging through my excessively abundant stash I realised that I had a ton of yarn with the labels still on, meaning that I had never washed it. I then decided it would be an excellent idea to run ALL of this yarn in one giant laundry batch and have it all ready to use. After removing all of the labels I ran it through the washer. No problem, nice and clean! On to the dry cycle while I relax with some crochet and a cup of tea.
I then returned to the dryer to collect what I thought would be my assorted balls of delightfully soft and clean yarn but what I came to find was this:

Yes, that is a 70lb dog hidden behind my stash.
Let’s have a moment of silence for what must have been hundreds of dollars of yarn. Unfortunately the dryer had completely unravelled and re-spun my yarn into one massive (thoroughly blended) log of yarn. I have to admit, as I brought my boyfriend down to the laundry room to show him the log of yarn that just seemed to keep coming out of the dryer I couldn’t hold back my hysterical laughter. But once I had it out of the dryer and took a step back, I burst into tears. That’s right, I actually cried over yarn. I really don’t cry easily but you fellow crafters can probably feel my pain, right?
After managing to wrestle my yarn into a garbage bag I shoved it to the back of a closet and figured I would deal with it later. My first attempt to unravel the pieces was clearly not going to work so I have come to accept the fact that I need to cut it all apart which will leave me with a yarn scrap pile bigger that anyone has ever seen.
All this trauma has had one positive outcome! Now I can show you how to create a yarn scrap ball 🙂 I have so many scraps that I will even be able to share three different joining methods with you! Each of these methods has it’s own pros and cons which I have shared below so that you can pick the method that will work best with your scrap yarn ball project 🙂

Anyone who did girl guides as a child knows how to do the reef knot! This is probably the easiest and most obvious way to tie your yarn scraps together.

This method weaves the two ends into the plies of the yarn for a seamless join.


Using a yarn needle weave the first yarn end back through itself, working your needle through the layers of yarn. Loop second yarn through open loop and repeat to make another closed loop. Pull the ends to tighten. Tie any excess ends.

The weaver’s knot is tied and then the yarn ends are cut off close to the knot.

Start by making a loop with the first yarn (purple) and then weave your second yarn (blue) through as shown in the picture.
While you are turning waste into yarn you might want to click the links below to check out my other tutorials on fabric yarn made from your old clothes or plarn made from plastic bags!
I hope this tutorial has been useful in helping you manage all those yarn scraps! I would love to hear what projects you have in store for your scrap yarn ball in the comments below 🙂
Happy crafting!

Hello crafters!
I’m excited to share my latest free crochet pattern for this extra cozy infinity scarf. While we have made it through the first half of winter there are still plenty of cold weeks left to whip up this beginner friendly project!

The Starry Night infinity scarf uses three balls of Caron Simply Soft yarn making it extra plush and warm.

The pattern is worked in the round so if you weave in your ends as you go there will be no weaving in to do at the end of your scarf 🙂 Let’s get to it!
The chain stitches at the beginning of each round count as the first stitch for that round
At the end of each round you will join to the first stitch of the round with a slip stitch.
When starting the next round, be sure to crochet your first few stitches over the tail from the previous round to avoid having the weave in all of your tails at the end.
HDC : half double crochet
For a more in-depth explanation of the crossed half double crochet check out my stitch tutorial!
Colour codes: Sunshine (S), Country Blue (B), Dark Country Blue (DB)
5 – 34 Repeat rows 2 to 4.

After completing my projects I like to put them through the washer and dryer before cutting off any tails so that they can settle into place.
I didn’t see any need to block this project as it stayed pretty square on it’s own 🙂

I hope you have enjoyed this crochet pattern as much as I have enjoyed making it! I would love to hear your comments or questions below or you can always reach me at Mataya@MatayaMade.com I love hearing from you 🙂
Happy Crafting!

Hello crafters, I’m so excited to share my latest crochet pattern with you!
I had a lot of great feedback from my One Day Winter Hat tutorial and don’t get me wrong, I LOVE that hat. I wear it pretty much every day during our Canadian winters and it keeps me warm and stylish 😉
However, like all winter hats I pretty much have only one hair option while wearing it. If I keep my hair down with my scarf and all those other layers I have a massive hair nest of knots to deal with at the end of the day so I pretty much have to wear my hair in a braid every day.
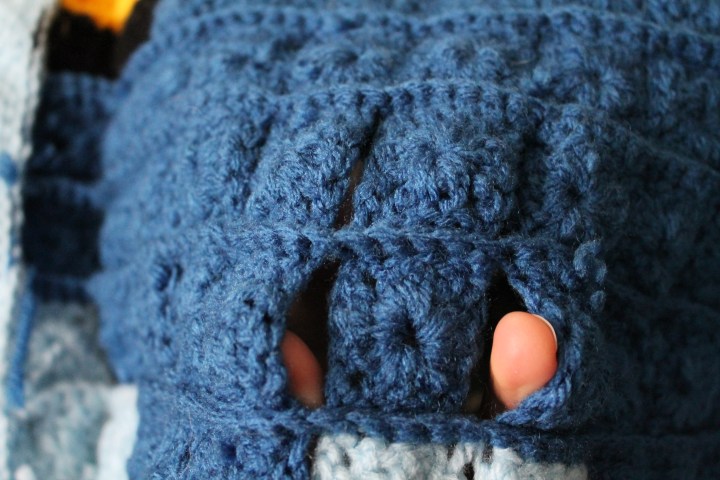
That’s where the ponytail beanie comes in! All the warmth and style of a cosy crochet hat with a stretchy hole in the top to accommodate all the ponytails and messy buns 🙂 I think this will be my new favourite hat! .
As stated above this pattern uses super bulky weight yarn. Super bulky weight is marked with a 6 on the label.
Some soft and affordable options are
These yarns also come in a huge variety of beautiful colours!

Single crochet (sc)
Double crochet (dc)
Yarn over (yo)
Bobble stitch (explained in the pattern below)
The first round of your beanie will be worked around your hair elastic.
Each round ends with a slip stitch into the first stitch of the round.
Round 1. 18dc into elastic. Join to first stitch with a slip stitch. (18)
Round 2. Chain 2. Work 2dc into each stitch around. (36)
Round 3. Chain 2. [Skip 1st dc. dc in next stitch. Go back and dc in first skipped stitch.] Repeat brackets around. (36)
Round 4. Chain 2. dc in each stitch around (36)
Round 5. (bobble stitch round) Ch 2. yo, insert hook and yo,pull up a loop, yo, pull through 2 loops, yo, insert hook into same stitch, yo, pull up a loop, yo, pull through 2 loops, yo, insert hook in same stitch, yo, pull up a loop, yo pull through 2 loops. You should have 4 loops on your hook, yo and pull through all 4 loops. Single crochet into the next stitch.
[Yo, insert hook into next stitch, yo, pull up a loop, yo and pull through 2 loops, repeat until you have 5 loops on your hook. yo and pull though all 5 loops. Single crochet into next stitch.] Repeat brackets around. (18 bobbles, 18sc)
Round 6. Chain 2. double crochet in each stitch around. (36)
Round 7. Repeat round 5 (18 bobbles, 18 sc)
Round 8. Chain 2. Double crochet in each stitch around. (36)
Round 9. Repeat round 3 (36)
Round 10. Chain 2. Double crochet in each stitch around. (36)
Round 11. Chain 1. Work one round of single crochet from left to right (also known as Crab Stitch)
Tie off and weave in ends.

I hope you enjoyed making your own ponytail beanie! I would love to hear your questions and comments below or even share a picture of your completed ponytail beanie, I would love to see them!
Happy crafting!

Hello crafters!
Welcome to my latest tutorial for crochet face scrubbies! I am always on the lookout for ways to reduce my household waste and this is one product that I use every morning. Ever since the micellar water trend started I have been using it as my morning cleanser with a cotton fluff. While I love the feeling of the cleanser I hate throwing out a cotton fluff every day and when it came time for me to buy a new bag I decided I would never buy another bag again 😮
This pattern is super simple and perfect for beginners! I actually timed myself and it took about ten minutes to make one face scrubby. I figure you will probably need to make at least seven so that you only have to do laundry once a week. So in just over an hour you can have your own set of face scrubbies ready to use. Let’s get started!
*A note about this yarn* most crochet face scrubbies are made with 100% cotton yarn which is awesome and easily washable. I chose to make mine with Bernat Baby Blanket Tiny because it is super soft and squishy! This yarn is polyester but it is tested and produced to be perfect for baby skin so that’s good enough for me.
Because of the texture of this yarn it can be a bit difficult to see your stitches, for this reason I recommend using a stitch marker at the beginning of each round. No need to purchase anything if you don’t have stitch markers; I often use bobby pins and they work great 🙂
*Each round starts with a ch1 and ends with a slip stitch to join.
*Bobble stitch: yo, insert hook into stitch, yo, pull up a loop, yo, pull through 2 loops on hook, yo, insert into same stitch, yo pull up a loop, yo pull through 2 loops on hook, yo, insert into same stitch, yo, pull up a loop, yo pull through 2 loops on hook, yo, insert hook into same stitch, yo, pull up a loop, yo pull through 2 loops on hook, yo pull through all 5 loops on hook
Make a magic circle
I am aware that this pattern doesn’t exactly follow the usual crochet circle math but I think that the size of the bobbles throws off the usual math a bit. I used trial and error to make the circle lie flat and this pattern works well for me!
Once you have completed your face scrubbies tie in all of your ends and stack them into your jar! I wash and dry my scrubbies with the regular laundry and they do fine 🙂

If you are looking for some more reusable household DIYs I recommend these tutorials for your next project:
I hope you have enjoyed this tutorial! Feel free to leave any questions or comments below, I love hearing from you 🙂
Happy crafting!

Hello crafters!
I am personally a dog person and anyone who knows me knows I’m completely obsessed with my perfect pup. But even as a dog person I have an appreciation for cats! They are just so cute and soft and their advantage over dogs is that I can pick them up and hold them (kind of hard to do with a 70 pound dog… but not impossible!)
As cute and cuddly as cats can be they all need their alone time, especially with a dog in the house, so I figured these cat hammocks would be an adorable and luxurious cat accessory! I have a couple of cat moms in my life that I plan on gifting these cat hammocks to 🙂

This free crochet pattern is pretty simple and it is also the perfect project to use up random odds and ends of yarn! I just made sure to use only worsted weight yarn (marked with a 4 on the label). Of course you can use any yarn you would like but you may need to adjust the amount of rows that you do to make sure that your hammock remains cat-sized.
Let’s get to it!
This cat hammock has two parts to it:
You will need to know how to make a dc cluster stitch to follow this pattern.
DC Cluster: [YO insert hook into stitch. YO pull up a loop. YO and pull through 2 loops on hook.] Repeat brackets until you have 4 loops on your hook. YO and pull through all 4 loops.
Chain 68.
55. Repeat row 3.
56. Repeat row 2.
57. Repeat row 1. Tie off.

To make your straps you will need to chain 150 stitches. Chain 1 more and single crochet in each stitch across. Tie off.
You will need to make 2 straps of each colour that you used for the main part of your hammock leaving you with six long straps 🙂

Grab your first strap and fold it in half to find the center. Also fold your hammock in half to find the center of your first double crochet row. Weave the strap under the middle two double crochet stitches; you may need to use a crochet hook to pull the strap through.

Continue to weave the strap over and under two double crochet stitches at a time. (Sorry I’m now using one of the white straps!)


Repeat this in the same stitches with one of each of the other colours of straps.

Repeat this process on the other end of your cat hammock!
Cinch your ends together by pulling the hammock material to the center of your straps.

That’s it! You’ve made your cat an adorable and cozy cat hammock! You can tie this hammock under a chair, under a bookshelf or even in a real tree to be honest!
I hope you enjoyed this tutorial and have managed to make your cat just a little bit more spoiled 🙂 Feel free to post a photo of your cat hammock below or tag @MatayaMade on Instagram; I would love to see how they turned out! (And I would also love to see your adorable cats 🙂 ) Comment below if you have any questions or comments 🙂
Happy crafting!

Hello crafters!
With spring finally starting to peek out I am getting so excited for outdoor activities! I spend the majority of my outdoor time either gardening or fishing but every now and then it’s nice to just relax in the yard with the BBQ and some fun yard games.
This tutorial will walk you through the process of making your own crochet hackysack! This tutorial is pretty easy and you will probably end up making a few of these for every kid (or adult!) that you know.

To make these hackysacks you will need to know the half double crochet stitch. Half double crochet is the same as double crochet but once you have yarned over and have three loops on your hook you will yarn over and pull through ALL three loops on the hook. (In double crochet you would pull through two loops and then yarn over again and do the other two loops)
Let’s get to it!
There are a variety of options for filling your hackysack. Dried beans are an excellent choice. I have heard of rice being used but I wouldn’t recommend it with these hackysacks as the rice will most like fall out of the small spaces between stitches. I used both navy beans and soy beans with great results!
A hackysack should weigh somewhere between 40 and 65 grams so you can weigh out 50g of filler and the weight of the yarn will account for the rest. This pattern uses about 10g of yarn.
*Each round is completed with a slip stitch to the top of the beginning chain
*The chain 1 at the beginning of each round does not count as a stitch
Make a magic ring.
You have now completed the first half of your hackysack! Repeat this pattern to make the second half. When tying off the second half leave a 6 inch tail that you will use to weave the two halves together.
At this point you should have two halves of a hackysack (one with a 6-in tail) and a 50g portion of filler.

Attach your yarn needle to the long tail. Hold the two edges of your hackysack pieces together. You will be weaving them together using the outside loops only.

Using mattress stitch into the outside loops only sew up the seam of your hackysack until you have only 6 stitches left to join.

Now pour your filler into your hackysack; using a funnel might be helpful. I just cut the top off a water bottle to funnel the beans in.

Now continue your mattress stitch to close up the rest of the seam. Tie off your yarn end with a double knot, trim the end and pull the remainder of it through to the inside of the hackysack to keep it hidden.

I hope you enjoyed this tutorial! If you are looking for your next fun summer project you might want to check out my Crochet Pocket Frisbee post 🙂
Happy Crafting!

Hello crafters!
Now that spring is upon us, all I can think about is gardening, planting and my little seedlings 🙂 Luckily I have managed to incorporate crochet into my gardening plans, crochet always finds a way!
Spruce up your plants and make some awesome home decor with my crochet flower pots pattern. This pattern is for a 4.5″ flower pot but I hope to release some other sizes soon! If you are a more experienced crocheter you can probably use this pattern as a template to make any size pot that you need 🙂

This pattern uses two colours to create a cool design but if you would prefer you can use just one colour throughout for a simpler flower pot.
To complete this pattern you will need to know single crochet, half double crochet and how to change colour while crocheting.
For an in-depth look at colour change you can check out my tutorial here.
You will also need to know:
If it doesn’t specify FLO or BLO then you can just crochet into both loops like you normally would.
Each round is joined with a slip stitch to the first stitch of the round.
Start with your first colour.
Tie off and weave in ends using a yarn needle.
If you are feeling a bit of confusion with the colour change spots here is a chart of the colour change rows.

Once you have finished up your crochet flower pots you will need to insert your flower pot liners. I found a 5 pack of pots for $1.99 which sounded like a great deal to me!
Insert your liner into the crochet pot and pull up the crochet part so that it covers the pot. I put a coffee filter in the bottom of each pot to stop the soil from coming out through the bottom.

Now for the fun part: re-homing your plant babies! Add soil to your pot about half way, add desired plants, top off with more soil and enjoy 🙂

I hope you have enjoyed this tutorial and are now surrounded by yarn-bombed plants!
If you have any questions about the pattern or would like to share your comments I would love to hear from you down below in the comment section.
Happy crafting!

Hello crafters!
Patterns for crochet scrubbies are turning up all over the internet! Not only is crochet (and crafting in general) becoming more popular but a lot of people are trying to shift to a more eco-friendly zero waste lifestyle. Making your own reusable scrubbies is a great way to reduce waste and save yourself a trip to the store 🙂
I love the new scrubby yarns that are coming out and they definitely do the trick if you want some handmade dish accessories but these yarns aren’t the cheapest so if you are like me and you want to be a little more eco-friendly but you also want to be wallet friendly you will love these twine scrubbies!
I purchased my twine from the dollar store for $1.25 and it made me four of these scrubbies; making them 31 cents each! Now that’s a great price!
I have done my tutorial photos with regular yarn just because it is easier to see the stitches. I used this exact pattern with the twine and it worked perfectly 🙂
Make magic ring.
Round 1. Make a magic ring. Chain 3. (double crochet into ring, ch1)Repeat bolded brackets until you have 8 double crochet stitches. Close magic ring. Slip stitch to 2nd chain from chain 3 at beginning of round.

Round 2. Slip stitch into first space. Chain 2. Work one double crochet but only pull through first two loops. Repeat 2 mores times until you have 4 loops on the hook. Yarn over and pull through all 4 loops. This is your first cluster stitch!

(Chain 2. Work a double crochet in the next chain space only pulling through the first two loops. Repeat 3 times until you have 5 loops on the hook. Yarn over and pull through all 5 loops.) Repeat bolded brackets until end of round. Slip stitch into top of chain 1 from beginning of round.

Round 3. Chain 1. Single crochet 3 stitches in each space and 2 stitches in top of each cluster. (The two yellow marks show where to place your two stitches on the top of each cluster) Tie off and weave in end.

There it is!

This project is pretty easy but I do have a couple of tips for working with twine:

I hope you enjoyed this tutorial! Please comment below with any questions or thoughts 🙂
Happy crafting!

I created this blanket pattern for my longtime friend who loves neutrals! I made this pattern baby blanket size as this one is a baby shower gift but following my pattern you can make this blanket in any size 🙂 I am considering making a large one for myself!
The ‘pebbles’ of this blanket are made of bobble stitches that give the blanket a really cool texture. I’ll explain the stitch below!
This was my first time using Bernat Maker ‘Home Dec’ yarn. I love the feeling of this yarn; it’s almost like t-shirt fabric which makes it super comfy.
One thing I did notice is that the yarn doesn’t have a lot of stretch once it has been crocheted. I think that is in part because I used a 5mm hook instead of the 8mm hook that is recommended on the label. I wanted to ensure that there were no spaces since the blanket is for a baby.
I would recommend keeping your stitches as loose as you can so that the blanket doesn’t crumple up too much when it is complete. Alternatively you could follow my pattern using an 8mm hook for a looser stitch.
Another point about using this yarn is that it is quite heavy, especially in this pattern, so it will make for a very warm blanket. Which could be good or bad depending on your intended use for the blanket, in my opinion the warmer the blanket the better so I am counting this as a pro!

I used two balls of each colour to make this baby blanket which came out to a 30″ square.
To crochet the bobble: yarn over and insert your hook into the stitch, then yarn over and pull up a loop just as you would to work a double crochet stitch.
Next yarn over and pull through two of the loops on the hook. Repeat from the beginning until you have 4 loops on your hook. Yarn over and pull through all 4 loops.
You have now created one bobble stitch 🙂
Chain 126 + 1
Row 1 (Clay) : Chain 2. Skip on stitch and single crochet in next. (Chain 1. Skip one, single crochet in next.) Repeat ( ) to end.
Row 2 (Clay) : Chain 2. (Single crochet in first chain space from previous row. Chain 1.) Repeat ( ) to end.
Row 3 (Cream) : Chain 2. (Single crochet in first chain space from previous row. Chain 1.) Repeat ( ) to end.
Row 4 and 5 (Cream) : Repeat row 3.
Row 6 (Clay) : Chain 2. Work 2sc. 1 bobble stitch. (2sc, 1 bobble) Repeat from ( to ) working your stitches into each ‘v’ and space from the previous row.
Row 7 – 9 : Repeat row 3.
Row 10 – 11 : Repeat row 2.
Row 12 – 14 : Repeat row 3.
Row 15 : Repeat row 6.
Repeat rows 7 – 14 until your blanket is square! End the blanket with 2 rows of Row 2.
The first step to finishing your blanket is the edging. I did a simple three rows of single crochet around the outside working (1sc, ch1, 1sc) in each corner.
The next step is to block your blanket. I just put mine through a wash cycle and then stretched it out on foam mats and pinned down the edges! Remember that your blanket should be 30 inches square so you can pin it out to that size.
I made Amigurumi Today’s crochet plush sheep to go with the pebble blanket! The pattern calls for a different yarn but I used the same Bernat Home Dec that was used for the blanket and it turned out great 🙂

I hope you enjoyed this pattern! I would love to hear your comments and questions in the comment section below 🙂
Happy crafting!

Hello crafters! This week’s post is a quick and easy project but it is still an important one! Poppy pins are commonly seen around November but wearing them year round would really be a good way to show support. These crocheted poppy pins are not only really beautiful but also a lot sturdier than the thin flimsy ones you will find in stores.
You can use this pattern to make just a few pins for yourself and your family or you can start making them in bulk to raise money. I plan to make as many as I can and sell them to raise money for Courageous Companions; a charity that provides veterans and first responders in need with certified support dogs 🙂 Let’s get started!
Round 1 (black): Make a magic ring. Chain 2(counts as DC) Work 11 more DC into loop. Close magic ring.
Round 2 (red): Chain 2. 1dc into same stitch. *2dc in next stitch* Repeat from * to * around.
Round 3 (red): Chain 2. *2tc in next. 2tc in next. 2tc in next. 2 tc in next. 1 dc in next. 1dc in next.* rpt from *to* around.
Round 4 (red): Slip stitch into first tc stitch. Chain 2. Work 1dc in same stitch. Slip stitch between the 2 dc stitches from the previous round. Continue around working 2dc in each tc and a slip stitch between each set of double crochet stitches. Tie off.
Finishing off these pins is super simple! Just give each poppy a quick pass with the iron to make sure it is flat.

Attach a pin to the back of each poppy with a dab of hot glue. Let cool before using.

I hope you enjoyed this tutorial and I would love to hear about your plans for your poppy pins in the comments below!
Happy crafting!


Hello crafters!
This tutorial is going to walk you through the process of making your own mandala crochet clutch. It uses the free viola pattern from MaritParit’s website to create a cute and unique closing flap! We will look into that below so let’s get started!

For my clutch I purchased a purse from the thrift store and took the strap off of that but you can also buy straps at craft stores or on Amazon.
This pattern is broken down into three main parts that you will need to crochet and the rest of the project is just finishing details. Following the pattern below will give you 1 large rectangle that will be the main part of the clutch, 1 small rectangle that will be the divider inside the clutch and 1 mandala that will be the closing flap.

The main stitch that I used for this project is the crossed half double crochet. If you are not familiar with this stitch head on over to my Crossed Half Double Crochet tutorial where I explain it in more detail. For the body and divider of the clutch I used two strands of yarn (one of each colour).
Chain 54 + 2.
Row 1. Half Double Crochet in 3rd chain from hook. Work 1 HDC in each stitch across. (54 HDC)
Row 2. Chain 2. Work the Crossed Half Double Crochet across the row. (27 crossed half double crochet)
Row 3 – 53. Repeat Row 2. Tie off.
This section is identical to the main section above but instead of working the Crossed Half Double Crochet stitch until Row 53 you tie off after Row 24.
Any mandala or circle pattern would work as a closing flap. I followed this super cute Viola Mandala pattern from the MaritParit website. To fit this project I ended the mandala after Row 19 of her design.
Blocking is particularly important for a crochet item like this one because it ensures that all the pieces of your project match up together when you are closing your seams.

The width of your clutch pieces should be 20mm. To ensure that your mandala flap fits probably you will want to block it out to a 20mm diameter all the way around. I simply use gym floor mats and round head pins 🙂
The first step to assemble your clutch is attaching the divider to the middle of the large rectangle using a simple slip stitch.
When slip stitching my edges together I like to use a smaller hook than I used to create the pieces just to make a less obvious seam. To seal the edges in this project I used a 2.75mm hook.

Fold your large rectangle in half and line up the edge of the small rectangle with the fold. Slip stitch these two edges together.
Once the divider is attached the sides of your clutch will still be open. This will be a good time to attach the mandala flap to the back of the clutch before you seal up the sides. I use paper clips to hold the mandala in place so that I can attach it to the back.
To attach your mandala use needle and thread and a simple backstitch to sew around the edge of the mandala. If you chose a thread that matches your yarn colours then the stitches will completely disappear as you work them around.

Once you have sewn around the edge of the mandala flip your clutch over so that you are looking at the inside. Sew a straight line across the top your large rectangle to secure the middle of the mandala. (along the dotted line)

Almost there! Now use your small crochet hook to slip stitch the sides of your clutch closed. You will be slip stitching through three layers : the front, the back and the side of the divider. I used two strands of yarn (one of each colour) that the the slip stitches would not be visible.


I made small bead strings using the same method that I used to attach the coins in my dance bra tutorial.

I attached a bead string into every 3rd single crochet around the edge of the mandala. You may want to put more or less bead strings depending on the size of your beads.

You have the option of crocheting the strap right onto the clutch but I wanted mine to be removable so I purchased some small clips that I attached to the strap and then was able to simply clip the strap onto the edges of the clutch.

And that’s it! I hope you enjoyed this tutorial and are well on your way to making your own mandala clutch! I am gifting this one to my sister for her birthday but I like it so much I might have to make a second one for myself 🙂
Let me know in the comments below if you have any trouble with the tutorial or if you just want to share your two cents! You can always email me too at mataya@matayamade.com
Happy Crafting!
")
Hello crafters!
If you haven’t heard of the ‘temperature blanket’ I’m here to fill you in! This fun project makes a multicolour blanket using your average daily temperatures to create a random colour pattern. The end result is a totally unique and random blanket in a beautiful array of colours.

Of course there are countless ways that you could create a temperature blanket; I’m just showing you how I made mine! You can take some ideas from my project to make your own or follow my tutorial step-by-step if you like the way mine turned out 🙂
This is part two of the tutorial so you can head over to Part One first if you haven’t completed that yet. Part one will get you all set up and show you which colours I used. Part one also contains a free downloadable chart that you can use to create your pattern!
After part one is complete you should have something that looks like this!

I already love how this blanket looks and I am extra excited that this project isn’t a gift and I get to keep it heehee 🙂
As with most crochet projects you will need to block your blanket out before adding your border.
Let your blanket dry out overnight before starting your border or simply dry it with a hair dryer if you are too excited to wait.
The first step to adding a border to your blanket is to work one row of single crochet around the entire outside of your blanket. I used Deep Forest just because that is the yarn that I had the most left of. In each corner you can work a single crochet, chain 1, single crochet.

Next gather up all your remaining yarn from this project. Hopefully you still have an array of colours left! I used up a few of my colours but I think I have enough of a variety to not need to purchase any more yarn.
Cut all of your yarn into 10 inch pieces. I found it very useful to wrap the yarn around my phone from top to bottom.

Pull the yarn off while holding all of the loops together and then cut through the bottom of the loops creating a bunch of 10 inch strands in one quick step! I’m sure there are all sorts of things around your house that you could use to wrap your yarn.

Once you have cut up a variety of yarn strings mix them all together so you will have even colour distribution as you work on your border!

I chose to only put the tassel edging on the side edges of my blanket because I wanted to square it out a bit but you can put this edging all the way around if you would prefer!
Start by taking 4 strands of yarn. fold them in half and pull through one of your single crochet stitches using your crochet hook. When you have partially pulled the yarn through the stitch fold the ends in through the loop and pull tight! This is the first tassel.


Then skip one single crochet and make another tassel in the next stitch.
Take 4 strands from each tassel and tie them in a knot about half an inch from the original knot.

Continue this around your edging to finish the tassel edge!

Now what will I do with this extra cozy blanket in the middle of summer? Seems to be doing a great job on picnic blanket duty!

I hope you enjoyed this tutorial and I would love to hear your comments and questions below.
Happy crafting!
")
Hello crafters!
Welcome to part two of my crochet minion blanket tutorial. If you haven’t started yet head on over to Part One and come back over here when you are all caught up!
Part two of this tutorial will show you how to
A complete printable PDF of this entire tutorial is available here: https://matayamade.com/product/minion-blanket-design-pdf/

The first step to adding a crochet border to any project is starting with a row of single crochet to give the project a neat edge and a foundation to start the rest of the border on.
Start with a row of single crochet in ‘light blue’. When you reach the corners work 1 single crochet, chain 2, 1 single crochet in the corner space and continue around.
Repeat row 1 in ‘blue suede’.
Repeat row 1 in ‘light blue’
For this row of your minion blanket border you will need to switch to your “blue suede” yarn. Start in one of the ch2 corner spaces from the previous row.
Attach yarn and chain 2. Double crochet into the first stitch of the row. Skip one stitch and double crochet into the next. Work one double crochet into the skipped stitch. You just made one crossed dc stitch 🙂 Continue the bolded pattern across the row. Once you reach the corner work a dc, ch2, dc into the corner space. Continue around the whole blanket.
Repeat round 1 with ‘light blue’
This round is worked with the ‘blue suede’ yarn. Start with a ch1 and then work crab stitch all the way around the edge.
Crab stitch is just single crochet worked from left to right instead of the usual right to left.
Now that your blanket is complete you need to block it before you attach the backing. The finished blanket measures out to be 40 inches x 40 inches. Simply dampen the blanket with water, stretch it out to this size and pin it in place until it dries.

I use gym floor mats and regular dressmaker pins to hold mine in place. If you are feeling impatient (like I usually am) you can use a hairdryer to speed along the drying process.
Now that your blanket is complete you are ready to add your fabric backing. I chose a super soft yellow fabric to complete my project but you can really use anything, even a minion print fabric if you really want to emphasize the theme!
I would suggest washing and drying your fabric before using it to make sure that it won’t shrink after it has become part of your blanket. Also make sure that all stray yarn ends are tucked behind the blanket.
Measure out your fabric to be 40 inches by 40 inches and then mark a 1/2 inch seam around the outside.
It’s time to fire up the sewing machine. Of course you can do this by hand! I’ve only had a sewing machine for a couple of months and before that I managed to get by with lots of hand sewing 🙂
Use whatever stitch you prefer I used the backstitch setting. Start by sewing around just the minion portion of your blanket (the part made up of all the small squares). This will prevent the backing fabric from moving around too much. This is the fabric pinned in place before sewing.

Once you have sewn this part of your blanket go around the outer edge of your blanket and fold the edge of your fabric in while pinning it in place. Now sew around the entire perimeter of your blanket!

Phew! There you have it! Your minion blanket is complete and looking amazing 🙂 I hope you enjoyed this tutorial and are excited to gift this adorable blanket to your own special minion! Or keep it for yourself; I won’t judge!
Leave any comments, questions or concerns below! I love to hear from you 🙂
Happy crafting!
")
Hello crafters!
Usually baby projects are fun and quick but this project will take a bit of extra time so I’ve divided it into two tutorials to make it a little bit more manageable. I started this blanket a while ago… (and by while I mean a few years, oops!) I didn’t really have a plan for it and I was just making it for fun. As many time-sensitive projects kept popping up I kept putting this one aside and it was eventually buried in my box of half finished projects.
I thought I would finally drag this project out and finish it once and for all. This minion blanket takes four main steps to complete:
Part one of my tutorial will cover steps 1 and 2. Once you have completed those steps you can head over to PART TWO to do the border and backing!
A complete printable PDF of this entire tutorial is available here: https://matayamade.com/product/minion-blanket-design-pdf/
Let’s get started!
**One ball of each colour will be plenty, however you will need 2 balls of the light blue as that is what you will be using to fill out the rest of the blanket.
This blanket uses a simple crochet square pattern that is only one round so they are pretty quick to whip up. Here is the pattern:
Create magic circle.
Round 1: Chain 3, 2dc into ring. Chain 2. (3DC, chain 2) Repeat ( ) 2 more times so that you have 4 small clusters with ch2 spaces between each one. Close magic ring and slip stitch to top chain 3 from beginning.

Using the pattern above you will need to make the following squares for your minion blanket:
Once you have completed all of these 288 squares (I counted!) it’s time to arrange them to make your minion! See my diagram below for arrangement of the squares.

This is the chart that I used but if you want to download a clearer PDF version simply click the link below!
Attach all of the squares by slip stitching along the backs of the squares in the back loops only! I found it easiest to connect all the rows going left to right first and then finish it up by slip stitching all the rows up and down.
Once you have connected all of your squares you should have something that looks like this:

Now that you have finished the minion image you just need to make the blanket a bigger size by filling in the outside. I used the RedHeart Super Saver in “light blue” that was used for the light blue squares in the image.
Start by working one row of single crochet all the way around the blanket. To ensure that your row is even you will want to work one single crochet in each of the three stitches per square. You will also work one single crochet into each corner stitch. This will give you five single crochet stitches per small square. When you get to the corner of the blanket work (1sc, ch2, 1sc) right into the corner space.

Continue working rounds around the entire blanket until you have completed 20 rounds.
Now you will need to add rows of single crochet just along the longer sides to turn the blanket into a square. I worked an additional 20 rows of single crochet on each of the long sides. If you want to keep the same texture around the whole blanket you will need to tie off after each row and start back at the beginning of the row as opposed to turning and working back along the same edge.
Here’s what your blanket should look like up to this point! Don’t mind the gym equipment; I use my exercise area to block my crochet projects heehee 🙂

I blocked my blanket out at this point just to get a good look at my blanket progress. It’s up to you if you want to block it now or wait until you have finished the border in Part 2!
Now that you have filled in your blanket you have completed part one of the minion blanket tutorial!
Check back soon for part two so you can finish your blanket off. Or better yet sign up for my newsletter so you can have all the latest tutorials (including part two!) delivered straight to your inbox 🙂
Please leave your questions or comments below; I love hearing from you!
Happy crafting!

Hello crafters!
This month I have been trying to put together a crochet sweater for my trip to England! I want a cozy sweater that I can hibernate in at the airport. I searched high and low to find an easy way to add a hood to my crochet project and EVERY pattern I could find just made a rectangle and joined the corners. While this method is super easy and quick it leaves you with a very pointy hood which I wasn’t really excited about.
In this post I’ll show you how I created a more naturally shaped hood for my sweater and how you can add one to your sweaters too!
This pattern is not going to go into specifics of stitch counts and rows because it does not come with a sweater pattern. This is a general guide on how to shape a hood so that it fits both your sweater pattern and your head shape; in other words this pattern is completely customizable 🙂
This method starts working your hood around the collar of your sweater and works it’s way up to the top.
Once you have decided how far around your sweater you want your hood to go use stitch markers to mark where each side of the hood starts and ends. This sounds really confusing so here is a picture!


Typically hoods start just in front of the shoulder seam so you can use that as a guideline.
You will notice that my sweater already has a sort of collar on it. That is just the pattern that I used but you don’t need to have a collar on your sweater to be able to attach a hood.
You can use any stitch that you would like for your hood. I would suggest using something that matches your sweater. My sweater is half double crochet so I used that stitch for my hood.
Begin by working one row from your first stitch marker across to the second stitch marker. Continue to work rows back and forth until you have a rectangle that reaches the top of your head. The rest of this design isn’t going to make your hood much taller so you want it to be big enough just with the regular rows.
This is the part where we change it up a bit! Normally you would continue to crochet in a rectangle and then fold your front corners together which leaves you with a very sharp corner on the back edge of your hood. What we are about to do is taper to shape the back of the hood into a slant.
First you need to count how many stitches you worked across your rectangle. You will use this number to figure out the rest of your hood design so I would suggest triple counting! I just counted each stitch as I worked my last few rows so that I was certain.
My hood happened to conveniently be 50 stitches so I will use that as an example.
Take your number of stitches, subtract 2, and divide by two. This is how many stitches you will work for your first row.
I have 50 stitches so my first row will be 24 stitches (50-2 is 48. Divided by 2 is 24)
Take your number of stitches, subtract 1 and divide by two. This is how many stitches you will work for your first row.

I ended up doing 7 rows with the above steps but it will depend on your yarn size, hook size and head size! So I would suggest trying it on as you go.
After you have completed the above steps you will have one side of your hood finished but you will still need to mirror what you have just done on the other side. Attach your yarn where the pink dot is in this picture:
Then repeat the above steps starting with step 1.

To finish your hood you simply fold the two sides together so that the seams line up. Using a piece of yarn and your yarn needle work mattress stitch from the back to the front.


Your hood is complete! You can add any sort of edging to your hood to really bring it together with the rest of your sweater. To finish my sweater I worked a row of crossed half double crochet and then a row of crab stitch around the entire edge including the hood.

I hope this tutorial has helped you finish off your sweater projects and would love to hear about them in the comments below. Also feel free to comment if you are confused about any part of my tutorial!
Happy crafting!

Hello crafters!
This tutorial will show you how to make your own crochet bow! Now you can accessorize your kids, pets and even yourself with our favourite thing ever : YARN 🙂
My pattern has three variations to give you three different sized bows small, medium and large.
Let’s get to it!
Any weight category 3 yarn will work for this pattern. The completed bows that are shown are made from the colours listed above but for the steps of the photo tutorial I used:
These crochet bows are constructed from two separate pieces; the bow itself and the wrap around the middle. Follow my pattern for whichever size bow you would like to make and then I will show you how to assemble the pieces below.
Main Piece
Wrap
Main Piece
Wrap
Main Piece
Repeat Row 3 13 more times so that you have 15 rows of single crochet. Tie off leaving 5 inch tail.
Wrap


 And there you have it!
The oppourtunities to use these bows are countless! I’m using mine to accessorize my fur baby with a new bowtie collar but you can make hair bows, bowties, decorations for crochet items or even use them to add a finishing touch to your wrapped gifts!

I hope you enjoy this tutorial and as always feel free to comment below with any questions or just to say hi!
Happy crafting!

Hello crafters!
I have yet another blanket tutorial to share with you! This one is so quick and easy and it has a super cool effect when it is finished. It is full of little bobbles that make a really nice texture hence the name bits and bobs!
I made this crochet blanket into a baby blanket size because I am hoping to sell some baby blankets at a craft fair but honestly this would be a great blanket for anyone and I am seriously considering making a second one in couch snuggling size for myself.
Any weight 3 yarn would be great for this project but I can’t get enough of Loops and Threads Snuggly Wuggly yarn. It is so soft and easy to work with and it comes in awesome colours. I also noticed that they have come out with some “dip dye” ones that basically look like tie dye! So those would be extra cool to use as well 🙂
I used three balls of each colour to create my blanket which came out to 38″ squared (a large baby blanket size) although I did have some leftover yarn. If you wanted to make a smaller baby blanket you would probably get away with 2 balls of each colour.
You can use this pattern to make whatever size blanket you would like so buy your yarn accordingly!
3 Double Crochet Cluster Stitch:
“YO insert hook into stitch, pull up a loop.” Repeat “” until you have 4 loops on your hook. YO and pull through all 4 loops. ***Note that the first cluster stitch of each row will only have 3 loops to pull through because it starts with a chain 2***
101. (BLUE) Chain 2. Double crochet across.
102. (BLUE) Chain 2. Double crochet across.

You could just leave your blanket as it is after row 102 but I always think a crochet blanket looks best with some sort of border. My go-to finishing border is Crab Stitch, especially for baby blankets, because it is a clean finish that doesn’t take long to do. Crab stitch is basically single crochet that is worked left to right instead of right to left. You can head over to my crochet edgings tutorial to see a more in-depth tutorial on crab stitch or you can use any one of the other edgings that I have posted there.

Another thing I would recommend you do to finish your crochet blanket is to block it out so that your edges are all nice and smooth. I usually just throw the finished blanket in the washer with the next load of laundry and block it out after that while it is still damp.
I hope you enjoyed this tutorial and are well on your way to making your Bits and Bobs crochet blanket !

Please comment below if you are having trouble with any part of this tutorial or if you just want to leave a comment that would be lovely as well 🙂
Happy crafting!

Hello crafters!
Summer is in full swing now so it’s the perfect time to post this tutorial for your own pocket frisbee! You might not have ever thought that you could crochet a frisbee that actually flies but this one really does the trick. There are so many advantages to pocket frisbees:
Now that you’re all excited let’s get to it!
**using two strands of yarn**
Ch 10. Join with slip stitch.


 This picture is after 5 rounds. You will notice that the end of your round will gradually move further away from your stitch marker because you are adding stitches in each round.
Head outside and enjoy!

My dog loves her new frisbee 🙂 Now I just have to teach her to actually bring it back …

Leave any questions or comments down below; I would love to hear from my fellow crafters!
Happy crafting!

Hello Crafters!
As obsessed as I am with crochet I never really thought I would create any amigurumi projects. Amigurumi is any crochet project where you are making a figure or doll. It always looked really complex to me and I didn’t think I would get to that level. Well this is one of those oppourtunities where I get to inspire you to aim high!
I found a few really cute stuffed animal patterns and figured I would finally open one up and actually read the directions. Was I surprised! The first pattern I looked at was this adorable giraffe and it is made up of pretty much all single crochet and the pattern is very easy to read (and free!) I figured I would give it a shot and with a few bumps along the way I managed to complete it 🙂
In this tutorial I will be sharing my tips for problems that I ran into along the way as some pictures of my project progress! This is not my pattern as I mentioned above but you can find it for free over at Amigurumi Today’s website.
Amigurumi Today’s tutorial suggests using fingering yarn which will be graded with a 2 on the label.
Really any size yarn will work for this project; a bigger yarn will just produce a bigger toy. Be sure to choose the right hook size for your yarn so that the stitches are closely woven otherwise your stuffing might sneak out of the holes.
To follow the pattern you will need three colours of yarn but if you want to get creative and change it up that would be lovely as well!
I used a 2.5 mm hook with the following yarn for my giraffe:
You will also need polyfil or your choice of material to stuff your giraffe.
One thing that I had some serious trouble with was the legs. I have never tried to crochet in the round with multiple colours before and believe me if you do you will end up with some weird looking seams!
Here is a photo of my first failure 🙁

Pretty scary right?
I tried a lot of different methods to hide the join and nothing worked well for me until I stumbled upon a video from June Gilbank it literally saved my project! June’s video demonstrates a really simple way to make your joins seamless and your rows perfectly straight. Here’s the link: https://www.youtube.com/watch?v=hO3C7ji4QBE
Once you have finished all the parts of your amigurumi giraffe you should have something that looks like this collection of stray body parts:

When attaching the pieces pin them in place first so you can decide on the look of all the pieces together before you start to attach them for real. I used a simple slip stitch to attach all the parts.
I attached the head first so that I could get a good idea of where to place everything else but it’s really up to you how you want to attach all the pieces!
Once all the parts are together it should look something like this:

It’s almost there!
There are a lot of options when it comes to eyes for your amigurumi projects. I just decided to use black thread to sew on some round eyes. One way to make sure your eyes end up being round is this simple trick that I used. Sew a star shape where you want the eye to be and then simply weave the thread over and under each thread starting in the center and going around until you have covered up the star.

Once you have completed the eyes you can get creative with adding any accessories that you would like! I made a cute scarf with a few rows of v stitch. If you have never used v stitch before it is very simple; if you know double crochet you will have no problem with it. To check out v stitch you can head over to my easy v stitch tutorial.

Thank you so much to Amigurumi Today for sharing this awesome ‘Hearty Giraffe’ pattern 🙂
Happy crafting!

Hello crafters!
I’ve finally found myself a hobby that doesn’t involve glue, yarn, paint or any other craft supplies. It also involves me leaving the safety of my house and actually venturing out with the other humans, horrors!!! This past fall I started swimming once a week for a little variety in exercise and I have to say I love it! Indirectly I suppose this hobby does involve yarn because this tutorial is for a super cute soap sock that I’ve made for my swim bag.
Originally I had my soap in one of those plain old plastic soap containers but it is way too boring to deserve a lifelong spot in my swim bag so I’ve decided to upgrade! Also I was sick of dropping my soap in the shower because once you drop your soap in a change room shower you can basically say goodbye to it as it mixes with the thousands of germs and soap bubbles from everyone else’s showers.
This handy soap sock features bobbles to give yourself a little scrubbing action and a wrist strap so you never have to wave goodbye to your soap again 🙂
I haven’t specified a colour for the yarn because I can’t seem to find it anywhere anymore. I have a feeling that the colour might be discontinued.
To begin your soap sock chain 12 + 1 stitches. Single crochet into each stitch. When you reach the end of the row work [1sc, ch1, 1sc] in the end of the row. Then instead of flipping your work like you normally would, single crochet along the other edge of the chain row into the same holes that you worked the single crochet on the other side.
When you reach the end work [1sc, ch1, 1sc] in the end and slip stitch into the first stitch to complete. That sounds a bit confusing so here is a photo of what your piece should look like.

Chain 2. [YO insert hook into stitch and pull up a loop. YO and pull through two loops on hook.] Repeat [ ] 2 more times. YO and pull through all loops on your hook.
SC in next stitch. [YO insert into next stitch and pull up a loop. YO and pull through two loops on hook.] Repeat [ ] 2 more times (should end up with 4 loops on your hook. Then YO and pull through all 4 loops. This is called a DC3Tog and it is what makes your little bobbles. Repeat the bolded pattern around. Slip stitch to finish round. (The yellow dot in the picture below indicates where you should put your slip stitch.

Chain 2. DC around. Slip stitch to join.
Chain 2. DC around. Slip stitch to join.
Repeat rounds 2, 3 and 4 until you have made 4 rows of bobble stitches. After the fourth round of bobbles work one round of double crochet. Tie off.
To make the strap you will need to use the cord stitch. For a full tutorial on the cord stitch simply head over to my tank top tutorial as I used to cord stitch to make my straps. You can make your strap as long as you would like but I made mine four times the width of my soap sock.
**I was not thinking straight and forgot to tie the ends of the strap together before taking my photos. You can leave the ends untied if you would like but if you want to have a wrist strap simply tie them together.**
Take your cord and weave it back and forth between the posts of double crochet from your last row.

I would strongly recommend washing your soap sock in a regular laundry cycle before use, especially if you’re using a dark coloured yarn, to remove excess dye. I made a different soap sock with a dark blue yarn and the first time I went to lather up my soap was all blue!
Pick out your favourite soap, slip it into your sock, cinch the top closed and enjoy!

Please comment below if you need help or if you have any comments or concerns! I would love to hear from you 🙂
Happy crafting!

Hello crafters,
I’ve been looking for ways to accessorize my car lately and one thing I’ve really been on the lookout for is the perfect steering wheel cover. All I can seem to find are boring black covers and my steering wheel is so frozen in the mornings that I finally decided to just crochet my own cozy steering wheel cover 🙂
Making a steering wheel cover for your own car is so simple! I only used single crochet and slip stitches to create this one!
You can use whatever yarn or hook size you would like to make your steering wheel cover. This pattern is simply single crochet worked up until it is the correct size.
The first thing you need to do is measure your steering wheel. The steering wheel cover needs to be exactly the right size so that it stretches around the wheel enough to hold it on tightly.
You will need to take two measurements :

Once you have your measurements ready you will need to chain on enough stitches to equal the first measurement that you took (distance around the entire wheel)
Then chain 1 and single crochet across. Once you have completed the first row of single crochet you will want to head out to your car and double check that you have done enough stitches to just stretch around the wheel. Don’t wait until you’ve done more than one row like I did or you will need to unravel a lot of stitches when you finish the entire cover and find out that it is too loose.
Once you are satisfied with the length of your cover continue to make rows of single crochet back and forth until the width of your rectangle matches the measurement of the thickness around the wheel minus one centimeter. For example; if the width of your wheel is four centimeters then you want to make your cover three centimeters across.
You want it to be a little bit smaller than the thickness of the wheel because the cover will not go completely around the wheel.
Once your rectangle is the right size simply hold the ends together and slip stitch them closed. Before you tie off your yarn test the steering wheel cover on your steering wheel one last time to make sure it is the perfect fit!

Enjoy!

I would love to hear from you below in the comment section if you have any questions, comments or just want to say hello!
Happy crafting!

Hello Crafters!
Welcome back to my Monster Baby Blanket tutorial 🙂 This is part two of the tutorial where we will cover the finishing and bordering of the baby blanket. If you missed part one visit that tutorial first to create the image and choose your colours and then head back over here to finish things off 🙂
The size of your crocheted image might be big enough for a baby blanket if you made your own charted image but this monster image is a little bit too small to be used as a baby blanket. For this reason I did simple rounds of single crochet around the image (working 1sc, ch1, 1sc in each corner) I did 24 rows.
Now you can do whatever size blanket you would like so you can simply single crochet around until you reach your desired size. The border we will be adding doesn’t really make the blanket any bigger so crochet around until you are at the size that you want your completed blanket to be.
For the border I used the same coloured yarn that I used for the body of the monster to tie the whole design together. Every time I put a border on a crochet project I start with a row of single crochet to keep things neat and make the border easier to crochet.
So to start your border work one row of single crochet all the way around your blanket!
The crab stitch edging that I used for this project is one of my favourite edges for two reasons:
One: it is very simple and very quick, perfect for giving any project a quick professional looking border
Two: you only need to know one crochet stitch to make this border work and it is single crochet! Yay!

To work crab stitch you simply single crochet around but you work left to right instead of the usually crochet method of working right to left. You are left with a tidy edge that has sort of a rope texture.
If you’re having trouble with crab stitch head over here to my edgings tutorial where I will cover it 🙂
Tie off your yarn and weave it through the edge of the border to hide the ends.
I am a little bit cheap with my yarn (or frugal 🙂 ) and I used a value yarn that isn’t exactly the softest. Everyone wants their crochet projects to be soft and cushy but it is especially important in this case because this blanket is for a delicate baby! Luckily all you need to do is send the completed blanket through a wash and dry cycle in your regular washer and dryer and it makes it MUCH softer. After completing this project it was so stiff that it could have been an outdoor doormat but after washing and drying it draped perfectly 🙂
The final step of this blanket (and any crochet or knit blanket!) is to block so you have a nicely shaped piece. I found it especially important with this project because carrying the multiple yarns through the project left the blanket with wavy lumps throughout. Also the crab stitch edging wanted to curl up so blocking it out will definitely prevent that as well.
I know it seems odd to soak your blanket after you just took it out of the dryer but trust me I’m not crazy! After washing and drying I simply ran the blanket under lukewarm water and gently wrung it out so it was damp. Then pin the blanket to a foam mat in the desired shape. Let it dry completely before removing the pins.
Sadly I had to fold my blanket in four because my foam mats went missing and I only have one left!

And that’s it, now you can make crochet blankets with any image that you can think of. Be creative and share your ideas with me in the comments below. I would love to see what my fellow crafters are up to!

Happy crafting!


Hello crafters!
Spring is just around the corner and that means it is time to deep clean the house. One area that definitely needs tending to is the drawer in my kitchen that is overflowing with plastic bags. I try to use reusable bags when I can but we all know that it’s impossible to remember to actually bring those things into the store!

I can’t think of a better way to deal with all these bags than to make plarn. Aka plastic yarn 🙂
Turning your grocery bags into plarn is the perfect upcycle as you can crochet or knit yourself (or a friend) anything out of these bags that would have otherwise just been sitting around taking up space and making you feel bad.
That’s all you need! I suppose I didn’t really need to make a list for that…
Start by folding your grocery bag into four the long way.

Cut strips about one inch wide from one end of the bag to the other.

Discard the strips that are unusable like the second strip from the left that has the handle hole in it.
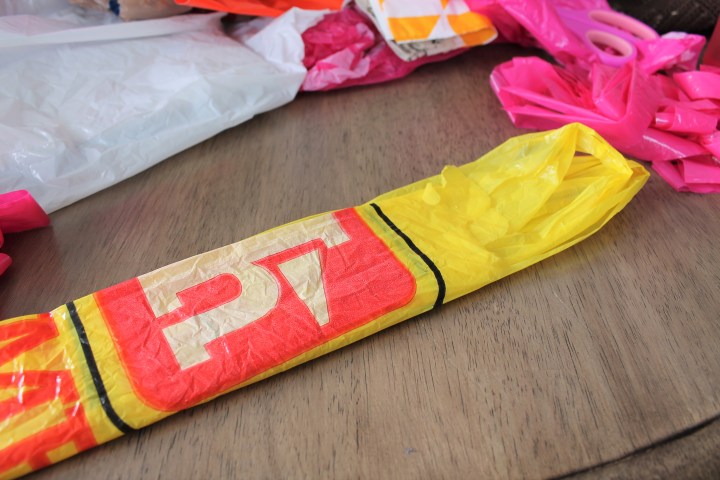
For bags like this one with handles, simply cut of the end with the handles and start from there.

Once you have a good assortment of strips cut it is time to assemble the pieces into plarn!
Each strip that you have cut should open up into a loop. Take two loops and pull one loop through the other from the bottom. Then insert the same end back into itself like this:

Pull the loop tight to seal the join but be gentle so that you don’t rip the bag.

And voila! You have made your own plarn!
I use a 16mm hook to crochet with this plarn as it is fairly thick to work with. You can do so much with this upcycle! Make totes, hats, rugs, or even a new grocery bag made of grocery bags! Check back soon and I will show you how I used my plarn to make a super cool recycled swim bag 🙂
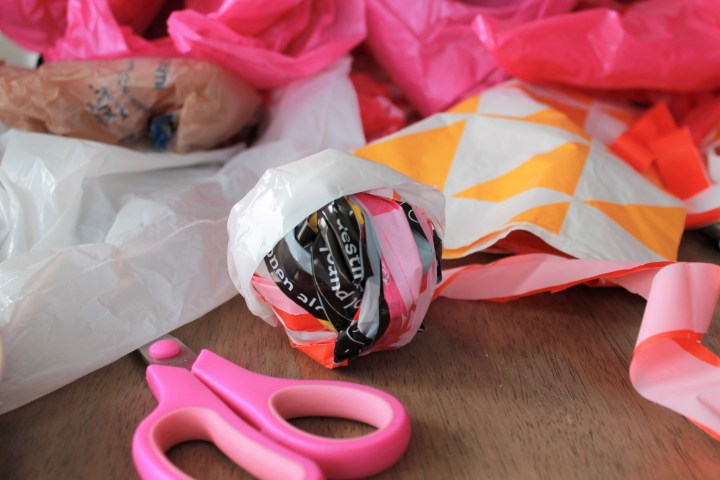
As always I would love to hear your comments, questions and ideas for using plarn in the comment section below. Or you can always email me at Mataya@MatayaMade.com
Happy crafting!

Hello Crafters!
This Monster Baby Blanket idea was in my head for a while before I finally brought it to life. I had lots of other projects on the go and I was trying to wrap up some projects before starting a new one. That’s the typical crafter life but I’m sure you all understand that!
This project is surprisingly simple but it does require a few different steps to get you to the final product which is why I’m dividing this tutorial into two parts.
Part One of this tutorial will show you:
The first step to completing your monster baby blanket is to head over to my colour change tutorial where I will show you how to keep multiple colours running through your project. Practice that technique with some scrap yarn and once you have an understanding of that head back over here to get started with your blanket!
This is the image we will be using for our monster baby blanket! But really any charted image could be used with great results.

For the free downloadable chart head over to the members page.
If you are not a current newsletter subscriber simply sign up here for access to the members page. 🙂
As with any crochet project you can use whatever colours you can imagine! I changed up my colour choices after creating this chart so my monster is a blue/green tie dye but of course I encourage you to get creative with your own project.
*Just a little side note* All of the white squares on the chart are to be worked in brown (or whatever background colour you have chosen) but I just left them white on the download so it is easier to read the chart.
To crochet your monster image you will only need to use single crochet, yay! 🙂 The pattern starts with a chain of 90 stitches. Then work 11 rows in the background colour as shown in the chart.
Once you have your 11 rows completed, mark the front side of your work so you don’t get confused. I simply poked a paper clip onto the front. This will come in handy when you lose track of where you are and need to get reoriented.
As you read the chart the first row will be read right to left like you normally crochet but once you do one row you will turn your work which means the next row of the pattern will be read left to right. Each time you turn your work and start a new row you will need to switch the direction in which you are reading the chart. To keep track of what direction you are working you can mark a little arrow on the side of your chart each time you start a new row.

I kept all of the colours running through the project until I wasn’t going to use that colour anymore and then I trimmed it off and kept working over the tail until it was covered. If you feel like there are a lot of stitches before you will need to use that colour again you can always trim it off and reattach the colour again later when you need it.
Once your monster is finished it should look something like this:

Congratulations! You finished part one of the monster baby blanket 🙂
Now block this piece of work and give yourself a pat on the back! Head over here for part two of the monster baby blanket where I will show you how to finish the blanket and how to complete edging.
As always comment below with questions or concerns or you can always email me at Mataya@MatayaMade.com
Happy crafting!

Hello crafters!
I’m sure you have all heard of the historical crochet ‘temperature blanket’. If you haven’t let me fill you in! The temperature blanket is a project that you work on over the course of the year with each row of the blanket representing a day of the year. The daily temperature corresponds to a certain colour of yarn that you will use for that day’s row. You end up with a 365 row blanket with a beautiful array of colours personalized to your location and year!
The temperature blanket is a pretty lengthy project so this post will be part one of two. In this post I will cover:
Let’s get to it!
If you search Pinterest for temperature blanket colours plenty of awesome colour combinations will come up. You can go with a classic rainbow selection, a certain colour in a variety of shades or colours that are complimentary like red, orange and yellow for example.
If you are like me and you are always looking for a new reason to visit the yarn store then simply go to store and pick out a yarn that you like that comes in a variety of shades. Just keep in mind that to follow along with this tutorial you will need 11 colours.
I chose Loops and Threads Impeccable yarn because it is easy to work with, it comes in bright solid shades in beautiful colours, it works with a 5mm hook and best of all it’s fairly cheap!
These are the colours that I selected :

Before you start recording your temperatures you need to find a trusty site where you can look up your daily temperatures. I used the Canadian Government Daily Data Report but if you don’t live in Canada I’m sure you can google ‘daily data report’ for your area. I used the average daily temperature but you could also use the daily high or daily low temperature.
Next you need to assign each of your yarn colours to a range of temperatures. Here is the Impeccable yarn colour assignment that I used:
Now that you have assigned your colours you have a few options. You could just reference your list like the one above and write out the colours for each day by hand but I am a bit of an organization nerd and I made a spreadsheet where I can just plug in the daily temperatures and the spreadsheet automatically displays the colour for that day.
Here is a little snapshot of the chart:

Once you have filled in all of the daily temperatures you can simply print off your spreadsheet and highlight each day as you complete that row.
I have a blank version of that spreadsheet for download on my members page. The members page is accessible for all of my subscribers so simply subscribe to my free monthly newsletter to gain access!
Now that you have your colours and temperatures all organized it’s time to finally start your blanket!
I used a 5mm hook and obviously the yarn selection shown above.
I couldn’t resist my favourite stitch for this project, the moss stitch. I think the moss stitch is extremely effective when using multiple colours because each row kind of nestles into the previous row really making your colours pop.
I used moss stitch a while back in my 3 easy dishcloths post so you can head over there to get the details on how to work that stitch! *Bonus* it only uses single crochet and chain stitch.

Alternatively you could use any stitch you want so get creative 🙂
I decided to start with a chain of 300 stitches in the hopes that my blanket will be somewhat square.
*Update since finishing my blanket* 300 chain stitches were not enough to make a square blanket. The completed blanket is rectangular but still quite cozy! If you want more of a square you will probably need to start with 375-400 stitches. Keep in mind though that this will make for one huge blanket! (queen bed sized!)
When you are switching colours as frequently as you will be in this project don’t forget to weave in your ends as you go because it will be a real downer if you have to weave them all in at the end. Just take the tail from the previous row and hold it along the back of your work for the first 5-10 stitches and then snip the excess tail!
That’s all you need to know to get started on your temperature blanket 🙂 I have only a few rows completed so far but I’m super excited to see the end result so I will probably be done soon heehee!

When you are ready, head over to Temperature Blanket Part Two where I will show you how to finish off your blanket!
Happy crafting!

Hello crafters!
I’m sure most of you already have lots of homemade goodies to make your home cozy and relaxing (we are crafters after all!) but have you given any thought to another area where you probably spend quite a bit of time? That’s right people I’m talking about your car! There is no need to limit our crafting obsession to the household yay!
This flower pot oil diffuser is the perfect project to start accessorizing your car with. It is super easy to make and costs only a few dollars in supplies, plus look how cute it is! Not to mention it will infuse your car with soothing all natural essential oils 🙂
*You will need some basic crochet knowledge to finish this project*
Cut your sponge to fit as snugly as possible inside your flower pot. Trim little bits and pieces if you have to! It doesn’t matter if it is ugly because by the time we are done you won’t even see the sponge.

Once the sponge is cut to size trace the edge of your flower pot onto your felt. Cut out the circle of felt and set it aside. Put a small circle of glue around the edge of the sponge and glue the felt on top.

I cut my toothpicks to different heights to give my flowers some dimension but that is a totally optional step. Once you are satisfied with the length of your toothpicks get your white glue and spread a thin layer around the whole toothpick.
Take your embroidery thread (don’t divide the strands, just use the whole thread) and wrap it around the toothpick starting at the top. Only wrap the thread up to the part of the toothpick that will be going into the sponge. The part of the toothpick that will be hidden in the sponge will poke in better if it doesn’t have thread on it.
Once your toothpick is wrapped sew the end onto the back of the flower with a few simple wrap around stitches. Use the white glue to seal in any ends that might be poking out.

Repeat with your remaining flowers.
Now poke your flowers into the sponge and you’re done!
Depending on the sharpness of your toothpicks you might need to poke little holes in your felt with some sharp scissors to help the toothpicks push through.

The macrame holder is a little addition that I wanted to try out because I have seen a ton of really cool macrame plant pot holders online and I’ve been curious as to how they are made. This is extremely basic because I just kind of guessed at what I was doing but if you want to look up some macrame designs or if you already know some macrame knots go crazy!
Start with 8 strands of crochet thread. Make them the length that you want your hanger to be plus about an inch.
Tie a simple knot at the very end of your thread.

Section off your threads into pairs. Tie each pair together. This knot is going to be at the top rim of your flower pot so keep that in mind when you are deciding how far down to tie the knot. I put mine about halfway down the thread.

You want the next knots to be around the middle of your flower pot. Take one strand from one pair and tie it with one strand from the next pair like this:

Do this all the way around so that all of your threads are tied together.
To finish measure the thread against your flower pot and tie all the strands together with one big knot that ends up in the center of the bottom of your pot:

That was easy right? While you have your supplies on hand you might as well make a few extra because these little guys can go anywhere, don’t just limit them to the car! They would also make adorable gifts 🙂

Simply put 5-6 drops of your favourite essential oil at the base of the flowers on the felt. (I’m currently using eucalyptus 🙂 ) The oils will seep through the felt into the sponge and from the sponge they will gradually seep out of the terra cotta pot diffusing the scent throughout your car!
The scent lasts about 7-10 days so you might want to keep a stash of essential oils in your glove box for easy refills 🙂
Here are a few suggestions for essential oils that you could use :

Lemongrass: calms nervousness, eliminates mental fatigue
Lavender: stress-reliever
Cypress: energizing and refreshing
Eucalyptus: Make your car feel like a spa 🙂 Invigorating and cooling.
Blended essential oils are always a great option for diffusing as well!
I hope you enjoyed making this as much as I did!
Please comment below with questions, comments or ideas 🙂
Happy crafting!

Hello crafters!
I’m really excited about this week’s post 🙂 I’m going to show you how to crochet these super adorable mini flowers! These mini flowers can be the perfect finishing touch for so many of your crafty projects. I have a secret something in mind for them but you will have to wait until next week to find out about that 😉
Now the only thing that makes these crochet flowers so mini is the hook size and yarn type that you will be using. The crochet pattern itself can be used with any type of yarn or any hook size to make a variety of different textures and sizes but if you want to make the loonie-sized flowers that I made here you will need to use these supplies:
I’ve done the tutorial photos with regular yarn so that the stitches are more visible.
This tutorial is going to assume that you know how to do a magic ring, single crochet, double crochet and triple crochet.
Once you have all your supplies together and you know these three stitches let’s dive right into the pattern!

Attach your petal colour into the back loop only of the first stitch. The entire first round is worked only into the back loops of each stitch.

Ch2. In the same stitch work 2TC and 1DC.
Slip stitch into the next stitch (BLO).

Continue this pattern around [DC, 2TC, DC in same stitch. Slip stitch in next stitch] until you have 6 petals.

Slip stitch into the first back loop that you worked your first petal into. Then slip stitch into the front loop of the same stitch.
Now we are starting the second round which is where we create the inner petals. This round is worked entirely in the front loops of each yellow stitch.
In the first stitch CH1, 2DC, 1SC in the front loop only. Slip stitch into the next stitch. This will put a little mini petal in front of the petal from the previous round.

Continue around with this pattern [work 1SC, 2DC, 1SC in the same stitch. Slip stitch in next stitch.]
At the end of the row slip stitch into the first stitch of the round.
Tie off and weave in ends.
These mini flowers are so addictive to make and barely use any time or thread so I’m sure you will be making multiple mini flowers once you get the hang of it!
Here is an easy to read version of the pattern:
Make a magic circle. Chain 2. Work 11DC into the circle. Close circle and tie off ends.
(Worked in back loops only) Attach yarn into back loop of first stitch. Ch2. Work 2TC, 1DC in same stitch. Slip stitch into next stitch.
[1DC, 2TC, 1DC into next stitch. Slip stitch into next stitch] Continue from [ to ] around.
Slip stitch in first stitch of round.
(Worked in front loops only) Slip stitch into first front loop. Chain 1. 2DC, 1SC in same stitch. Slip stitch into next stitch. [1SC, 2DC, 1SC in same stitch. Slip stitch into next stitch.] Continue from [ to ] around.
Tie off thread and weave in ends.

Please comment below with any questions or thoughts, I’d love to hear how you are using your mini flowers!
**UPDATE** check out what I did with my mini flowers here : DIY Essential Oil Diffuser
Happy crafting!

Hello Crafters!
WOW! I can’t believe it’s -35°C today! Even for Canadians that’s a bit extreme. This type of weather basically involves hibernation as it is way to cold to venture outside. What better way to warm up than to crochet and drink tea all day! Preferably with a furry toe warmer (aka dog) to keep your feet warm.
If you need something cozy to curl up under I would strongly suggest this cozy cottage blanket, it works up super quick and is extremely thick and warm. Also ideal for a wintery weekend at the cottage hence the name 🙂
Using the size 16mm hook chain an even number of stitches to create the blanket size that you would like.
I used the moss stitch for this blanket (one of my favourite stitches because it is so easy yet looks so good!) To see the moss stitch tutorial in depth visit my 3 dishcloth patterns post and there is a clear photo tutorial for the moss stitch on there.
Continue to work moss stitch until your blanket is the desired size then head back over here to work on the finishing touches 🙂
After the last row of moss stitch, quickly work one row of single crochet all the way around the blanket to set a foundation for the edging.
Once you have completed your moss stitch rows you will want to block your blanket so that it has nice straight edges and to make it easy to add your edging onto your single crochet row.
To block my crochet work I use foam mats that most people use for their gym floors. I have them set up in the basement where I know nobody will come strolling through and step on all my pins.
Blocking your work is a lot more effective if you soak the yarn first and then gently wring out most of the water so that it is just damp. For a piece this big I just put it through a light cycle on the washing machine.
Lay the blanket out on the mats and start pinning! I use regular round head pins to pin down the edge of the blanket. I put the pins about 2 inches apart.

Once your edges are all pinned down leave it out for about 24 hours to dry, (or at least overnight!).

Now for the final step of your cottage blanket: the fringe edging!
This edging is so cute and I can tell I will be using it for many more projects because it is also super easy 🙂
For the edging I used a 5.5mm hook because the large hook size make the stitches too loose. The 5.5mm hook gives the fringe a nice tight join to the blanket.
Attach yarn. Insert hook into first stitch and yarn over. Pull up a loop that is about double the length of the desired fringe length. Make sure you pull up the same sized loop every time or your fringe will be all uneven. I used a paintbrush as a measuring stick so that each loop was uniform.

Twist your loop around until it is ready to twist around itself. I twisted about 20 times.

Hold the middle of the twisted loop to ensure that it folds in the middle. Slip stitch back into the same stitch where you drew up the loop.

Easy right?! Now just slip stitch into the next stitch and pull up another loop!
Continue this all the way around the blanket.

Sadly this blanket was a gift for my sister but it turned out so awesome I might have to make a second one for myself!

Now I just have to break the news to my toe warmer that this blanket isn’t for her…

Please leave your comments or questions below! I would love to hear from you 🙂 You can always email me too if you’d prefer at Mataya@MatayaMade.com
Happy crafting!

Hello Crafters!
I’ve wanted to share these crochet flower pillows for a while now but they were a Christmas gift so I couldn’t safely share them without ruining my sister’s Christmas surprise! Now that I’ve gifted them I’m posting to share with my fellow crafters 🙂
These pillows use the Flower Center Granny Square so head over there to make your squares and when you are ready pop back over here so I can show you how to put it all together! I used nine squares per pillow.

To make two pillows (like I did), you will need 18 flower granny squares.
First you need to connect your nine squares into one giant square. Put two squares together (make sure the fronts of the squares are facing each other so you have the back of the squares facing out).

Use a simple single crochet to connect the squares. I used the white yarn that was used to make the granny squares. Make sure you are putting the hook through only the back loops of each square. This is how I created the white lines between each square. I think it looks cute but if you would prefer that the white doesn’t really show then you can crochet through both loops on each square.
Work a single crochet in each stitch across and when you reach the corners single crochet into the corner spaces. When you reach the end of the square grab two more squares and continue, starting with the corner spaces.
Then grab two more squares and do the same!
At this point you should have six squares connected by one long row of single crochet.

For the last three squares use the same technique that you just used to connect the other six. Line them up face to face with the squares that you have already connected and stitch them together with single crochet through the back loops.
Now go along the back of your squares and seal them up using the same method that you used to connect the first squares. Remember to single crochet into both the stitches and the corner spaces.
After all your squares are connected work a row of single crochet in white around the entire square. (In each corner SC, ch1, SC) This cleans up the edges and will make it easier to connect everything later. Not to mention it makes a pretty design! 🙂

Connect your blue yarn along the edge of the square. Make sure you have attached an even number of stitches. The back of the pillow is just repeated rows of Crossed Half Double Crochet. Follow my tutorial to learn that stitch. Work that stitch all the way up until you have a back panel that is the same size as the front of the pillow.

Flip your work inside out and single crochet along the edge of the back that you just did and the edge of the flower squares. You should have a pillow cover with just the two sides not connected.

Typically for a pillow I like to connect the edges from the inside of the pillow so that the seam isn’t visible but this pillow will have a border worked around it so I’m going to create the edge seams on the outside of the pillow so that they can double as a foundation row for the border.

Fold the back of the pillow underneath the squares leaving one row of Crossed HDC in the front.
To keep the edges lined up while I’m working on them I like to take clips or clothespins and clip them together. This way you don’t have to worry about getting to the end of the row and realizing that your front and back don’t line up.
Attach your blue yarn to your hook.
Work a row of single crochet into both loops on one of the open sides of your pillow.
Now insert your pillow!
(Or any crochet pillow for that matter!) You can buy pillow forms but I find them to be fairly expensive and not very cushy. I bought a firm body pillow and cut it in half then sewed up the edges to make two squares pillows. Sadly I had to sew by hand but if you have a sewing machine that would be super awesome!
The size of your pillow is better on the ‘too big’ side as opposed to maybe being a bit too small. A nice plump pillow will properly stretch out your stitches making your crochet work look its best. Also with a bit of use the pillow will naturally squish down a bit so you want it a bit big to begin with.
Once you’ve stuffed your pillow in there seal up the last edge with a row of single crochet.
I measured my pillowcase to be about 38cm so I made my pillows 40cm square to give a couple of cm of stretch to the pillowcase.
Your pillow might look a bit wonky after you close it up but you just need to punch it and fluff it a little bit to make sure the stuffing is evenly distributed.
Time for the finishing touch 🙂

I used a simply picot edging to finish off these pillows to give them a cute flowery theme.
To complete the picot edging you simply single crochet into the first stitch then [slip stitch into the next stitch, ch 5, slip stitch back into the same stitch to close the picot, then single crochet into the next stitch] and repeat the brackets around.
If you are having trouble head over to my more in-depth tutorial on my 3 crochet edgings post. While you’re there you could also try using one of my other edgings on your pillows to give them a different look!
That’s it!

I hope you enjoyed my tutorial 🙂 Let me know in the comments below if you need help with any of the steps. Or you can always email me at Mataya@MatayaMade.com if you’re have questions, comments, or concerns 🙂
Happy crafting!

Hello Crafters 🙂
This week I’m sharing this awesome bobble ear warmer with you! The great thing about this pattern is you can use any yarn and any hook size because instead of counting stitches you just measure against your head as you go. I shared the yarn and hook size that I used in case you want to make exactly what I made but feel free to dig through your yarn stash and use up one of those instead.
*NOTE* I am not saying that you can’t go out and buy a new yarn. I would never say something so ridiculous.
Chain 10 + 1
Row 1: Single crochet in each stitch across.
Row 2: Turn. Ch 2. DC4tog. *Into the stitch indicated with the pin in photo* The ch2 counts as your first DC so the DC4tog is actually your first DC5tog [SC in next stitch. DC5tog] Repeat brackets to end of row. Should end with a single crochet stitch in the last stitch. You will have five bobble stitches.

DC5tog : DC but instead of yo pull through two loops twice you only yo and pull through the first two loops and leave the remaining 2 loops on your hook. Do this for all 5 DC leaving you with 6 loops on your hook. At this point, yo and pull through all the loops on your hook.
*note* When you are doing the first bobble stitch where the ch2 counts as one of your five dc stitches you will only have 5 loops on the hook before you yo and pull through all the loops.
Row 3: Turn. Ch1. SC in each stitch across.
Repeat rows 2 and 3 until the length of the ear warmer fits snugly around your head! Remember that after you wash it a few times and wear it in it will loosen slightly so it’s better to be a bit too tight than a bit loose.
You want to end with a bobble stitch row because we started with a single crochet row so you will have 2 rows on single crochet at the join if you end with a row of single crochet. Basically you want to keep the pattern continuous by having only one row of single crochet between each bobble row.

Once you are satisfied with the length of your ear warmer simply fold the two short ends together (with the bobble stitches facing each other) and slip stitch them closed.

Flip the ear warmer right way round and enjoy! 🙂

If you really love this ear warmer and you don’t have the time or yarn to make this one … don’t have a meltdown! This bobble ear warmer is the newest MatayaMade giveaway 🙂
All you need to do to enter the giveaway is sign up for the MatayaMade newsletter and if you are already subscribed to my newsletter you are already entered!
Even if you don’t win this giveaway you will still receive a monthly newsletter with new project ideas and access to the members page on MatayaMade.com. Visit the newsletter page to find out more about it!
As always please leave your comments below if you need help or if you want to share your experience/tips making your own ear warmer!
Happy crafting!

Finished your crochet project but feel like it’s missing something? That’s where these super easy and attractive crochet edgings come in! This tutorial will give you three different edgings to choose from:
Each one is fairly basic and won’t take you very long. Usually when I’m adding crochet edgings to my projects I do a few simple steps first to make life easier.
Once you’ve completed those steps continue on to the edging tutorials below!

Crab stitch is crazy simple and really quick to do. If you are in a hurry to finish up your project (nudge nudge Christmas gifts!) then crab stitch is a great choice. It looks nice and tidy and if you know single crochet you can do crab stitch!

*This tutorial will work in rows but it is the same technique when completing this edging in the round.

I know you aren’t going to believe me but this stitch might be even easier than the crab stitch edging! A picot is a pretty round stitch that is created by creating a few chain stitches and then slip stitching into the indicated stitch. There are thousands of variations on how to use picot stitches in your crochet work but this particular edging might just be the simplest one!
Start with your row of single crochet.


Chain 1. Single crochet into first stitch. Slip stitch into next stitch. Chain 5. Slip stitch into same stitch to create mini picot. Single crochet into next stitch. Repeat bolded section to the end.

You can experiment with how many single crochet stitches you want to put between the picots to create different looks.

Cathedral stitch is a term that is pretty general as there are a ton of variations on the cathedral pattern. In general they all make the same sort of pointed petal edge. It looks so elegant but is really quite simple to do!
Start with your row of single crochet.
Row 1: Double crochet across.
Row 2 : Chain 2. Double crochet across.
Row 3 : Chain 1. Single crochet into first stitch. Skip 2 st. [4 DC, ch3 picot, 4DC] in same space. Skip 2 stitches. Single crochet in next st. Skip 2 stitches. Repeat bolded section to the end. Single crochet into last stitch.


*Reminder*
To create a picot stitch simply work a number of chains (in this case 3) and then slip stitch back into the same stitch to make a small loop of chain stitches.

And there you have it! Three great options to finish off your crochet projects. Please share your crochet edgings creations below or feel free to comment if you have question or concern 🙂
Happy Crafting!

Hello crafters!
I’m so excited to share this one day winter hat with you! I’m putting my current projects on hold to make this crochet project for myself 🙂 My current winter hat is scratchy and not very warm so when I saw this colourful cozy yarn I knew I had to buy it. Plus it’s hard to feel guilty buying more yarn when it’s for a purpose!
Realistically this one day hat can be made in about 3 hours but I’ve factored in tea breaks 🙂
This pattern starts with the ribbed part of the hat. I like the ribbing because it make the stitches extra stretchy for ultimate comfort. I wanted to be able to fold the ribbed part up over my ears so that it will be double-layered so you will realize that the ribbed section seems extra long.
To start I chained 18 stitches. If you don’t want to fold the bottom of your hat over then you can just chain 10 stitches.
Single crochet into each stitch in the back loops only (BLO)
Turn. Chain 1. Continue with this pattern until the ribbed part fits comfortably around your head. Remember that the ribbing is stretchy and the hat will stretch out slightly with wear so make it a bit more on the snug side.

When you are satisfied with the thickness of the ribbed section fold the two ends together and single crochet into the BLO

Once your ends are connected, double check that it fits your head properly because this is the time to add or remove rows for the perfect fit.
Turn your work so that you are working along the edge of the ribbing. Single crochet evenly around the edge.
*Tip* for crocheting evenly around the edge. I crocheted into the top of each ridge and in either space beside it as I have shown with pins in this photo. (Sorry it’s a bit blurry, I need to work on my photography skills!)

When you get back to the first single crochet stitch slip stitch into it.
I would suggest putting a marker into this stitch just so you can keep track of where the beginning of the row is. You don’t need any fancy markers; I use a bent paperclip or a bobby pin most of the time and they seem to work fine 🙂
Round 1: Chain 1. Work one single crochet in each stitch around.
Round 2: [Skip one stitch and work a single crochet into the next stitch. Go back and single crochet into the stitch that you just skipped.] This is called a crossed single crochet stitch. Work these all the way around.


Round 3: Single crochet in each stitch around.
Round 4: Crossed sc around.
Round 5: In this row you will need to work 4 sc2tog evenly around. The rest of the stitches will just be regular single crochet. Everybody’s hat will be different since it is measured specifically to your head so I can’t give you a count of when to do the sc2tog but if you just work one into each quarter of the round then you will be fine!
To sc2tog simple work a single crochet like normal but instead of yarning over and pulling through keep both loops on the hook. Then insert your hook into the next stitch (white pin) YO and pull through all the loops on the hook:


Round 6: Crossed sc around.
Round 7: This round will need to have 6 sc2tog worked evenly around and the rest of the stitches will be sc
Round 8: sc around adding 6 sc2tog
Round 9: sc around adding 10 sc2tog
Round 10: [work 2 sc, 1sc2tog] repeat.
Round 11: [1sc, 1sc2tog] This round is continued around until you only have 5 or 6 stitches remaining. Just work it continuously without chain 1 or ss at beginning or end of round.
Cut your yarn leaving a 5-6 inch tail.

Using a yarn needle, weave the yarn through your last few stitches then back through the original loop and pull tight!


Congratulations! You just made yourself a cozy winter hat! And it took no time at all right?!
Optional: pompom or other cool accessories 🙂

Find a printable PDF pattern on the Members Page. Simply subscribe to MatayaMade newsletter to gain access 🙂
Please comment below with questions or comments!
Happy crafting!

Hello Crafters!
Today I’ll show you a super cool technique that is surprisingly easy. I’ve seen a lot of really cool crochet image projects and have been wanting to try one out myself. The key skill that you need to create these one-of-a-kind projects is crocheting with multiple colours at once.
Of course you don’t want to be tying of a bunch of loose ends and cutting your yarn every few stitches so I’m going to show you how to keep your colours running through your project so you can switch colours in a matter of seconds. No cutting required!
To start I just did a few rows of single crochet for something to work on.

When you are ready to change colours do not finish your last stitch. As you can see I have the two loops on the hook from the last single crochet. To complete the stitch YO with your new colour and pull through to complete the single crochet.
This does not count as your first stitch in the new colour, you are simply attaching the new colour to the final stitch of your first colour.

Keep your first colour (pink) and the tail of your new colour held along the edge of your crochet work.
Continue to crochet as normal with your new colour but just be sure to keep your extra strands of yarn tucked in so that your new stitches are hiding them.

When you reach the end of your work turn like you normally would and chain 1.

Make sure the colour you aren’t using is still held along the back of your work.

And that’s it! Easy right?
This can be done with multiple colours at once, just make sure they are all tucked in as you go.
Check back in a couple of weeks to see my multi-coloured crochet creation. *Hint* there might even be a free crochet pattern in there you you guys 🙂
Let me know in the comments if you are having trouble with any of the steps. Or you can always email mataya@matayamade.com with comments, questions or just to say hi!
Before you go don’t forget to subscribe to MatayaMade’s newsletter before the end of the month to be entered into the all-natural eyelash serum giveaway!
Happy crafting!


Hello crafters, let me introduce you to the Tulip Stitch!
I love this stitch. I used it about a year ago to make my sister a blanket for Christmas and it turned out great! It looks like a difficult stitch because lets face it, you’re creating tiny flowers! But believe me you will be shocked at how simple this stitch is to learn and it works up very quickly so it’s great for a blanket or scarf if you don’t have a huge chunk of time.
For this tutorial I used Bernat Super Value Yarn. It’s on the more affordable side of the soft yarns so it’s the perfect choice for those bigger projects. (I apologize in advance for some blurry photos; I was trying to do some nighttime photography 🙁 )
To start the pattern you need a few rows of single crochet. Chain multiples of 3 + 2 stitches in your background colour.
Single crochet into each chain starting with the second chain from the hook.
Chain 1. Turn. Single crochet into each stitch.
You should have something that looks like this:

Attach your green yarn and ch2.

Skip one stitch, (DC, ch1, DC) into next stitch. (Indicated with pin)


(Skip 2 st. 1DC / ch1 / 1DC in same space.) Repeat to end.
When you reach the end of the row skip one stitch and work 1DC in last stitch.
Attach flower colour, turn, ch2.

5DC popcorn inside ch1 space of previous row.


To work the 5DC popcorn stitch make 5DC in the same space. Remove your hook and insert it into the top of the first DC and the fifth DC stitch, pull loop through so that you have one loop on your hook.
Ch2. Repeat the popcorn stitch into each of the green ‘v’ working 2 chain stitches between each popcorn.

When you reach the end of the row ch1 and DC into the last stitch.
Return to the base colour, work 1SC between the last flower and the DC stitch. Work 3SC between each flower. When you reach the end of the row work 1SC in between the last flower and the CH2.
CH1. Turn. Work 1SC into each stitch. You can repeat this for as many rows as you want as long as it is a multiple of 2 rows to make sure the popcorn stitch will be facing the right way for each row of flowers.
That’s it!

Let me know what you created with this beautiful stitch in the comments below!

Hello Crafters!
I love the Crossed Half Double Crochet stitch! It is simple and quick and it produces a pretty cool result that some people even compare to the look of a knitted project.
I used the Crossed Half Double Crochet stitch in these cute flower granny squares a couple of weeks ago and now I’m going to show you how to work this stitch on its own to make a larger piece.
Crossed Half Double Crochet is usually labelled as ‘crossed HDC’ in patterns.
To do this stitch you will need to know half double crochet and how to chain and that’s it!
If you don’t know the half double crochet stitch don’t panic 🙂 I’ll show you how to do that below. Let’s get started!
To begin you will need to chain an even number of stitches. I am doing 30 just for tutorial purposes but just chain whatever you need for your project as long as it’s a multiple of 2.
Once you have your chain ready, HDC into the 3rd chain from the hook.

To work a HDC: yarn over (YO) and insert your hook into the chain. YO and pull a loop through so that you have 3 loops on your hook. YO and pull through all loops on your hook. That’s a HDC! Basically the same as a double crochet but instead of yarning over and pulling through only two loops you pull through all three loops.

Continue across the row working one HDC into each stitch.
When you reach the end of the row ch2 and turn over your work.
Skip one stitch and HDC into the next stitch. (indicated with pin)

Work one HDC back into the stitch that you just skipped. That’s one crossed HDC stitch!

Continue with this pattern until the end of the row.
When you reach the end of the row work 1 HDC into the last stitch.

Ch 2. Turn work.
Some people will work a row of just HDC in between each row of Crossed HDC but it is not necessary to make the stitch work. I chose to make each row crossed HDC except for the initial starting row.
So basically you can alternate row 1 and row 2 or just continue on with the row 2 pattern for the rest of your project.
And that’s it! Pretty simple right?
This stitch is great for a cozy blanket but I think it would also make a great dishcloth or warm winter hat because the stitch works up to be a fairly thick fabric based on what type of yarn you’re using.

Check back in a little while to see what new project I made with the crossed half double crochet!
As always feel free to leave comments or questions in the comments section below 🙂
Happy crafting!

Hello Crafters!
It’s been a couple of weeks since I did a crochet tutorial. If you’ve been following my tutorials you will have noticed that my projects are kind of all over the map with painting, crafting, sewing, etc. But if I’m being honest with myself crochet is probably my favourite craft of them all, or maybe it’s just my yarn obsession that is making me say that heehee 🙂
This week I’m sharing a simple granny square with an easy flower center. This square is going to pop up later in another tutorial as it is part of a bigger project so keep in touch if you want to see what I made from these granny squares!
If you use the yarn and hook size that I used the squares will block out to 5-inch by 5-inch squares.
Beg Cluster (Beginning Cluster) : ch3, *yo, insert hook into ch1 sp. yo, pull through, yo, pull thru 2 loops on hook, Repeat from * 3 times. yo, pull through 5 loops on hook.
Cluster : *yo, insert hook into ch1 sp. yo, pull thru, yo, pull thru 2 loops. Repeat 4 times, yo, pull through 6 loops on hook.
Crossed DC (Crossed Double Crochet) : Skip 1 HDC, DC in next HDC, DC in skipped HDC.
BLO : Crochet in the Back Loops Only

Normally you would crochet through both of the loops at the top of the stitch. Crocheting in the Back Loops Only means that you only insert your hook into the one loop that is marked with the red line in this photo.
(yellow) Make a magic ring. ch4 (DC in ring, ch1) x 7

(white) ss into ch1 sp. Beg cluster. Ch5 Cluster, ch5. Repeat to end. (8 clusters total)

(blue) ss into ch5 sp. ch3 (2DC, ch2, 3DC) in same space. 4DC in next ch5 sp. *(3DC, ch2, 3DC) in next ch5 sp. 4DC in next space. rpt from * 2 times. join with a ss.

(yellow) ch2, HDC in each st. BLO. In each corner work (2HDC, ch2, 2HDC)

(yellow) ss into next HDC, ch3, DC back into join at end of previous round. Do 1 crossed DC. For corners work(DC, ch2, DC)

You should end up with: 28 crossed DC / 8DC / 4 ch2 spaces.
(blue) ch2, work 16 HDC in BLO on each side. For corners work (2HDC, ch2, 2HDC)

Blocking is super important for all crochet and knit projects but it’s especially important for granny squares. If you want to connect your granny squares you will have a much easier time if they are already all stretched out to be the same size. These particular squares ended up being 5-inch squares by the time I blocked them.

Blocking is really simple but produces beautiful results. I used a yoga mat that is already scratched up and I folded it up to make an extra thick pad. Then I measured out a 5-inch square and simply pinned my damp granny squares to it putting a pin in each corner, each edge, and the center of the square.
Thank you for checking out this tutorial! I would love to hear about the projects that you create with these squares. Please post your comments below if you want to share or if you have any questions!
Happy crafting!
 Crochet Dishcloths")
Hello Crafters!
Today we will make three beautiful dishcloths using three different (but easy) crochet stitches!
First off, if you have never made dishcloths before you have been missing out because they are quick to make and they present the perfect oppourtunity to practice new stitches since they are usually just worked in a basic square shape.
Now normally I would say go crazy and use whatever exciting yarn you can find in your stash but for this project I would not recommend doing that. Dishcloths are pretty annoying and useless if they don’t absorb water and you will need to wash and dry them countless times. You definitely want them to keep their shape after you worked so hard on them!
For these reasons I would strongly recommend that you use a cotton yarn. A cotton blend would work as well but I would try to make sure it is at least 60% cotton to ensure good results. Whatever you do avoid wool. Wool will ‘felt’ when it absorbs water and it will felt a little more every time you put it through the washer and dryer.
For this tutorial I used a couple of different cotton yarns but there are a bunch out there just read the labels! (Yay! an excuse to buy more yarn 🙂 )
The first stitch I want to show you is the mini bean stitch. It creates little bumps (or beans!) that are perfect for a scrubby / absorbent dishcloth. Let’s begin!
ROW 1 : Chain in multiples of two and then add one stitch.

YO and insert your hook into the third chain from the hook, YO again and pull your hook back through the stitch.

YO again and insert hook into same stitch. YO and pull hook through same stitch. Now you should have 4 loops on your hook.
YO and pull through all the loops on your hook.

You’ve created your first bean!
Chain 1. Skip the next stitch and create a bean stitch in the next stitch.
Continue this pattern across to the end of the row.
 Once you reach the end of the row, crochet a bean stitch in the last chain.
 ROW 2 : Chain 2. Turn your work over.
Crochet a bean stitch into the space on the side of the previous bean stitch (I marked the first few spaces so you can see where to work your bean stitches). Continue the pattern from the previous row to the end!
(Bean stitch, CH1, Bean stitch in next stitch)
That’s it for the mini bean stitch!

The next stitch is called Crossed Half Double Crochet it is a beautiful stitch that looks similar to knitting!
For this stitch you will need to use Half Double Crochet (or HDC)
Half Double Crochet is the same as Double Crochet but once you have yarned over and have three loops on your hook you will yarn over and pull through ALL three loops on the hook. (In double crochet you would pull through two loops and then yarn over again and do the other two loops)
Now that that is cleared up let’s begin!
Chain an even number of stitches (I did 40)
ROW 1 : HDC in 3rd stitch from hook and each stitch across to the end of the row.
 **Reminder** HDC means YO, insert hook into stitch, YO pull hook back through stitch, YO and pull through all the loops on the hook.
ROW 2 : Chain 2. Skip 1HDC and HDC into the next stitch. (The space indicated by the hook in the picture)


Then HDC into the HDC that you just skipped.

Continue this (skip 1HDC, HDC in next, go back and HDC in skipped HDC) until the end of the row.

ROW 3 : To start a new row simply Chain 2. Turn your work over, and continue the bolded pattern from Row 2!
Just fold your square diagonally to check when you have done enough rows to form a square.
You’ve completed your second dishcloth! Wasn’t that easy?
 Now for the third and final dishcloth stitch, the Moss Stitch. I’ve seen this stitch called the Linen Stitch as well.
Start with a chain with an even number of stitches.
ROW 1: SC into the 4th chain from the hook. CH 1.

Skip the next chain and SC into the next stitch. CH 1. Continue to end of row.

ROW 2: Chain 2. Skip first SC and SC in chain space. (Indicated with yellow dot)

Chain 1 and single crochet into the next chain space. Continue across. At the end of the row SC in the last space.
 Continue this pattern until you have formed a square!
(CH2, SC in chain space, CH1, SC in chain space)

Good work you’re a dishcloth pro now! I think I know what all your friends and family are getting for Christmas 🙂
If you have any questions or suggestions please feel free to leave them in the comments below.
 Happy Crafting!

Good morning crafters!
Who else is loving the dreamcatcher trend that is catching on lately? They are everywhere; tattoos, drawings, pillows, and of course hanging in your windows and on your walls!
Today I’m going to help you make your own crochet center dreamcatcher because they are super easy to make at home and purchasing one of these babies will cost you an arm and a leg.
I used sock yarn because I’m not smart and didn’t realize how ‘felty’ it would be. It’s a pretty colour though 🙂 I would recommend using cotton or crochet thread!
I used Patons Kroy Socks FX in ‘Cameo’ and a 3.75mm hook.
To begin you will need to make a magic circle. If you forget how just click over to this tutorial where I show it in the first step.
Into the magic circle:

Chain 6. (counts as 1DC and 3CH) 1DC in same stitch. Chain 1.
**Skip next 2 stitches and (DC, CH3, DC) into next stitch (indicated with orange pin)
 Chain 1.** Repeat from ** to ** until end of round.
 Slip Stitch in 3rd chain of the first DC to end the round.
SS into next space. CH3 (counts as a DC), 2DC, CH3, 3DC into same space.
 *Slip Stitch into next space (indicated by orange pin). 3DC, CH3, 3DC into next space.*
Repeat from * to * around.
 SS into the last space. SS into the 3rd CH of the first DC.
SS into each stitch across until you get to the next space.
Chain 3, (DC, CH3, 2DC) into first space.
 Chain 5. *2DC, CH3, 2DC* into space on top of next petal.
 Chain 5. Repeat from * to * until end of round.
 SS into 3rd chain from the CH3 at the beginning of round to end round 4.
Chain 3. (counts as a DC), DC in next DC
Work ** (3DC, CH3, 3DC) into the top of the last petal.
 Sorry the picture is blurry, I didn’t realise until I had taken all the pictures!
DC into each of the next 2DC. SS into next space. DC in each of the next 2DC.**
Repeat from ** to ** around until end of round. SS to close.

SS in next 4DC and in next space. (Basically SS until you are at the point of the last petal)
(2DC, CH3, 2DC) in same space.
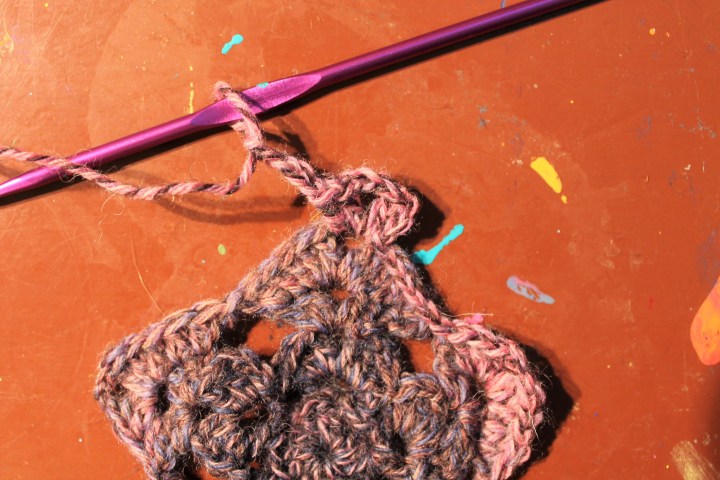
**CH5, SC into the SS from the previous round, CH5**
Repeat around. SS to end the round.

Wow look at how much better it looks blocked!
I know I say this every time but you need to block this work really badly! It curls up while you are doing it and it won’t look as beautiful if you try to put it in the dreamcatcher without blocking it first.
Tie the yarn anywhere onto the rim. Wrap it around like this:

Once you go around the rim once pull down one of the loops.
 Pull the yarn through the back of the loop.
 Then pull the thread through the loop you just made:

I recommend leaving your crochet center with all the pins in it. It is already stretched out perfectly and held in position so just place your ring around it and continue to weave your string around like you did for the rim of the dreamcatcher just weave into the crochet center at the points of the star and any other spot that needs to be held in place.

Now you are done weaving it’s time to accessorize!
I wrapped embroidery thread around the rim (just seal off with a dab of glue). I also made bead strings with a bunch of seed beads and embroidery thread. I just put some white glue on the end of the thread so that it hardened into sort of a needle and it was really easy to thread the beads on! Fishing line would also work great!

Add whatever other embellishments you have around the house; feathers, fabrics, etc. Be creative!
Subscribe to my monthly newsletter to get awesome project inspiration every month and to be entered into my giveaway for this super mini crochet center dreamcatcher keychain!
 Find out more about the MatayaMade newsletter (including how to join) right here.
I would love to hear about how you personalized your dreamcatchers in the comments below. Also feel free to ask any questions about this tutorial if you are running into trouble with any of the steps.
Happy Crafting!

Hello Crafters!
Today I am sharing my Granny Square Crochet Tank Top Tutorial with you!
When I started crocheting I was happily satisfied with making granny squares. I mean they are easy, beautiful, and they work up quickly! But once I had made blankets for each one of my friends and family I wasn’t quite sure what to do next.
That’s when I had the bright idea to start making clothes! How hard can it be? I figured I knew the basic stitches so I shouldn’t have a problem. After a few attempts I got really discouraged 🙁 Clothes were more of a challenge than I thought and most of my attempts came out all disfigured! Thank goodness crochet is easy to unravel (physically, not emotionally).
That’s when I decided to just take one half step up and make a tank top while still carrying on my obsession with granny squares! So here it is; the in-depth tutorial of how to make your own tank top just in time for summer!
To ensure that your tank top is actually going to fit you need to take a bust measurement and divide it by four to get the diagonal measurement of each square. This is because you have four granny squares forming the top of the tank top.
For example if bust measurement is 80cm then each granny square will need to measure 20cm from corner to corner.
**Don’t forget** when you block your squares (which you definitely should be doing!) your squares will increase slightly in size. So if you are a few mm off and you aren’t sure if you should do another round to make it the right size I would just leave it as it is.
You can use any stitch or pattern to make your straps; I chose to make a cord because I didn’t want my straps to be too bulky but I wanted them to be strong.
Turn the cord over so you can single crochet into the bar that goes across the arrow. I know that sounds super confusing but if you look at the picture it will make more sense:
Turn cord over again and this time you will see 2 bars at the bottom of the arrow:
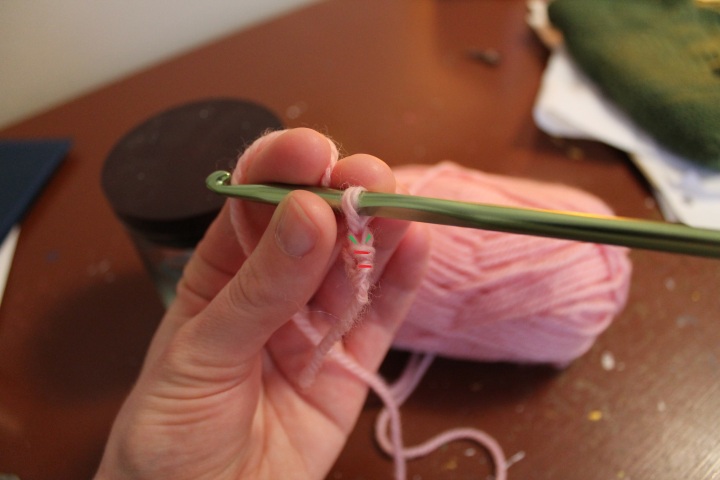
Continue this step until you have a strap that is the desired length! Finish with a slip stitch into the last two bars.
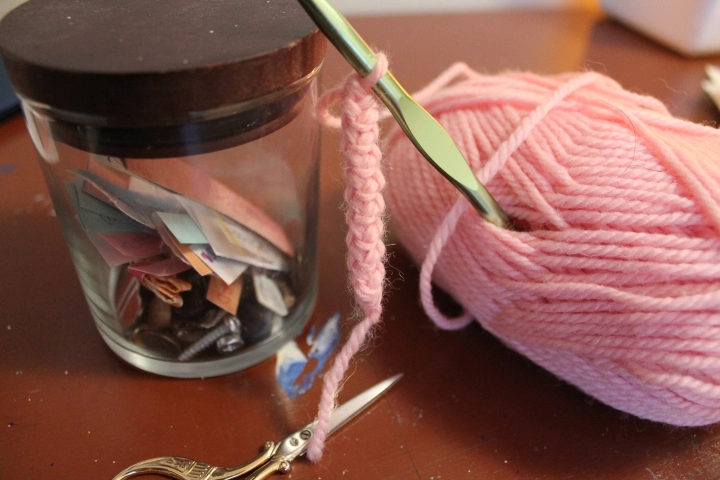
Once you have completed all your squares and triangles you will need to lay them out like this:
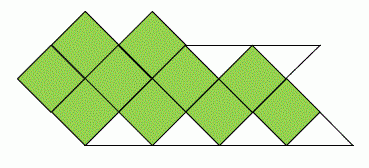
Connect all the seams as per the diagram. I simply used single crochet to connect the outside loops of the squares, although slip stitch would work just as well. Make sure you have the backs of the squares facing out when you connect them so that the seams are on the inside of your tank top.
Once you have connected all the seams you should have something that looks like this:
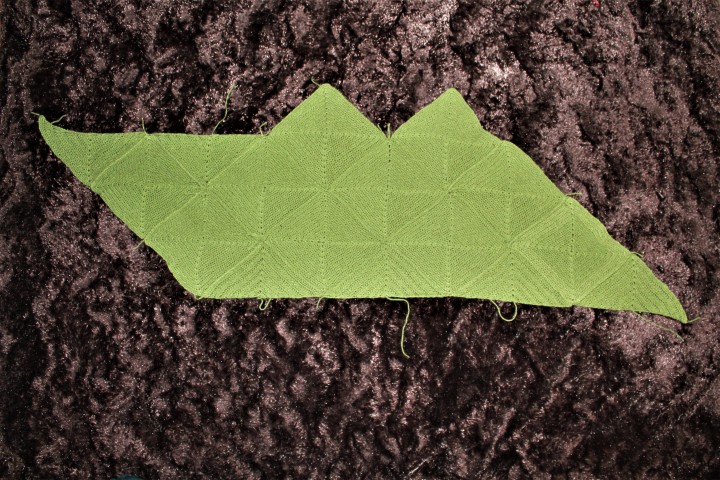
Once you have closed up the last seam, the next step is to put a single crochet border around your edges. This step isn’t mandatory but I kind of want to say it is! It really improves the appearance of your finished top. Also, if you plan to add any sort of decorative edging it will be a heck of a lot easier to work it into a nice neat line of single crochet instead of your raggedy granny square edges.
Now that your edges are nice and neat you can go ahead and attach your straps.
I used some slip stitches to just fasten the straps on either end. I would suggest putting your tank top on and pinning the straps at the exact position that you want them. This way you can avoid having to redo this step when you realize you have put them on crooked!
Now that your tank top looks like a tank top you might be feeling super awesome about your skills. But wait! You still have to put the finishing touch on your work…
At this point in the project you are going to put an edging along the bottom of the tank top. I chose the cathedral edging because it is easy but it looks fancy 🙂 Of course you can use any edging pattern that you like.
Don’t be alarmed!! I did the edging tutorial photos with a different yarn just so it would be easier to see what I was doing because the yarn for my tank top is very thin. The edging for your tank top is exactly the same, just work it into the row of single crochet along the bottom of your tank top instead of the row of chains that you will see in these photos!
 Start with a chain 1. SC into next stitch
 Skip 2 stitches and work 4TC into next space
 Chain 3. SC into the top of the last TC to form picot. (Red dot indicates the space where you should insert your hook for the single crochet) This step creates the picot aka the pretty round stitch on the point of the triangle.
 Work 4TC into same space as the other 4TC.
Skip 2 stitches, SC into next stitch, skip 2 more stitches and repeat this pattern until the end.
Just to summarize; this is the pattern that you will repeat:
*4TC, ch3, SC into top of last TC to form picot, 4TC* skip 2 stitches, SC in next stitch, skip 2 more stitches.
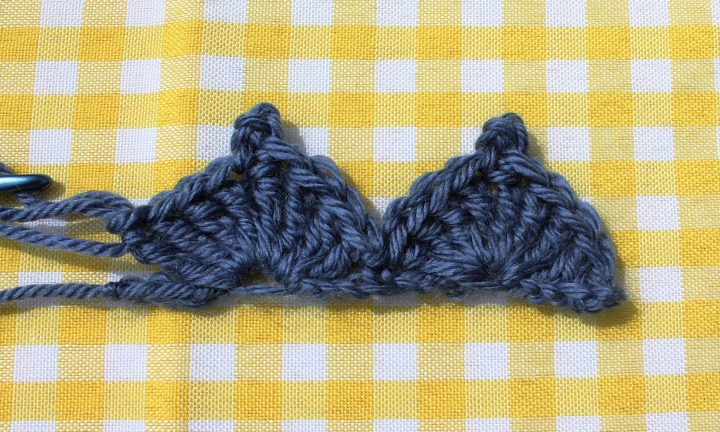
I made blocking a section so you don’t skip it! Please block your tank top, you will thank yourself when it dries and your tank top is perfectly squared!
Here is a little visual of how I pinned mine.
 (I pinned the tip of each point in the edging so that they all hang at the same height without curling)
And that’s it, you’ve made a garment that you can actually wear! Woohoo!

I would love to hear your comments below sharing how you personalized your crochet tank top.
Happy crafting!

Hello Crafters!
Welcome to my first ever Beginner Belly Dance Hip Scarf Crochet Tutorial!
If I had to choose my favourite person to craft for it would have to be my mum! For one, she always really appreciates anything I make her because she is pretty knowledgeable about crafting so she knows how much effort goes into a project. Secondly, everybody knows that moms love it when their kids make them stuff because every mom thinks their child is a genius. Heehee 🙂
My mum is very inspiring to me! She is always trying new things and really sticks with them even if they are difficult. I wish I could be more like her! One of these new things that she started in the past couple of years is belly dance!
This got me really excited because the colourful costumes and awesome accessories open the door for a million awesome crafting projects! Can you say sequins, beads, colourful yarn, and glitter?!
This month is my mum’s birthday and as part of her gift I decided to make her a belly dance hip scarf. I came up with this pattern to create more of a mesh type scarf (aka full of holes). This pattern could also make a great shawl!
For this project I used :
Hook: 3.75mm
Yarn: Loops & Threads Pizzazz “Natural Multi”
Stitches: Chain Stitch, Single Crochet (SC), Double Crochet (DC), and Triple Crochet (TC)

To begin, chain as many stitches as you would like. This chain that you are creating is both the top of the scarf and the strings that dangle off the ends of the scarf, so keep that in mind when you are choosing how long to make it.
I like the look of the strings hanging down so I chained 260 stitches.
 DC into 3rd chain from hook. Continue to DC across in each chain stitch until you reach the end.
 Turn your work and chain 1. SC into each stitch across until you get to the part of the chain where you want your scarf to begin. (End of string and beginning of the triangle)
Now I wanted the triangle to go all the way around the waist but maybe you just want the triangle to be on one hip or halfway around the waist. It’s totally up to you! Just measure it against your own body as you go to make sure it’s the size you want.
Just for your information I did 80 SC stitches before I started the triangle.
**If this is confusing think of it this way: I started with 260 stitches, the first string is 80 stitches, the second string will be the same length (80 stitches)
Out of the 260 stitches that I started with 160 of those stitches will make up the strings on the side so the triangle part of the scarf will be 100 stitches across at the top.
Once you are ready to start the triangle chain 3. This will count as a triple crochet stitch.
 Skip 3 stitches and 2TC into the next stitch.
 (Ch 2, skip 3 stitches and 2TC into next stitch) Continue this pattern across until only 82 stitches remain. (Or whatever number of stitches your string length is plus 2)
 Skip 2 stitches and work 1TC into the next stitch.
SC into each of the remaining stitches until you reach the end of your work. SS to secure yarn and tie off.
 SS into the space between the bar and the ‘V’ created by the 2TC stitches. (Your SS should be in the space where the blue dot is in the photo.
Chain 5. (Counts as 1TC and 2 Chain stitches)
2TC in between the 2 ‘V’s formed by the TC stitches from the previous row.
Chain 2. 2TC in next space.
**Remember** When you reach the last space in the row work 1 TC into the last space. Turn the work. Chain 5. And continue along with your (2TC, 2Chain) pattern.
Continue this pattern until you have reached the end of the triangle.
WOW! That took a while. Now that your triangle is almost complete it should look something like this at the point: Now it is totally up to you if you want to leave it at this and add tassels / cool accessories.
Or if you would prefer you can continue working along with this pattern until your triangle reaches a point! I thought that at this stage my scarf was long enough so I left it at this and added yarn tassels and braids to finish it off.
This is the perfect time to block your work! It sounds to me like a lot of people don’t bother to block their work when it’s done but to be honest it really improves the appearance of your finished project!
Blocking is especially important on a project like this one. After I completed the triangle, the edges were all rolled underneath the scarf. Blocking fixes this by straightening out the shape of the scarf.
I just use a foam mat (like the ones you are supposed to put on a gym floor), or use a yoga mat or carpet, anything pokable! I use regular round head pins to fasten the scarf to the mat. Typically if I’m blocking something square I would measure out the desired shape on the foam with a pencil so that I can have a guideline of where to stretch the square to. But in this case the shape is kind of irregular so I just eyeballed it 🙂
To block I simply soak the scarf in lukewarm water and gently squeeze it out so it doesn’t drip, then I pin it to the mat and leave it out to dry! It would probably be best if you left it out for 24 hours to dry fully (or at least overnight!).
 I would suggest stretching your wrists and making some tea before continuing!
Now this is the part where you get to be creative! You can do your favourite border stitch to finish the edge or use beads and sequins to decorate. I personally used leftover yarn to make tassels. I added some braids and some seed beads for extra sparkle!
 Get creative with this project! Hip scarves are so fun because they really have endless options for how you want to personalize them!
I would love to hear your hip scarf decorating ideas in the comments section below! Also feel free to comment if you have any questions with this tutorial!
Happy Crafting!

Hello Crafters!
I recently posted a tutorial for my Super Simple Solid Granny Square as a great all-purpose square that you can use for practically any crochet project! I have decided to use that pattern for my latest project which is my Easy Granny Square Tank Top. (Keep your eyes peeled because that tutorial will be coming in the next couple of weeks!)
As I started my tank top project I realized I was going to need some half squares to complete the project. (Or ‘triangles’ as some people call them!)
So after a bit of research (and trial and error) I figured out the Super Simple Granny Triangle which works perfectly with my tank top pattern but would also work great for any other project that usually uses granny squares.
Start with a magic circle. (check out this tutorial to make a magic circle)
Chain 3. (This will count as your first double crochet stitch).
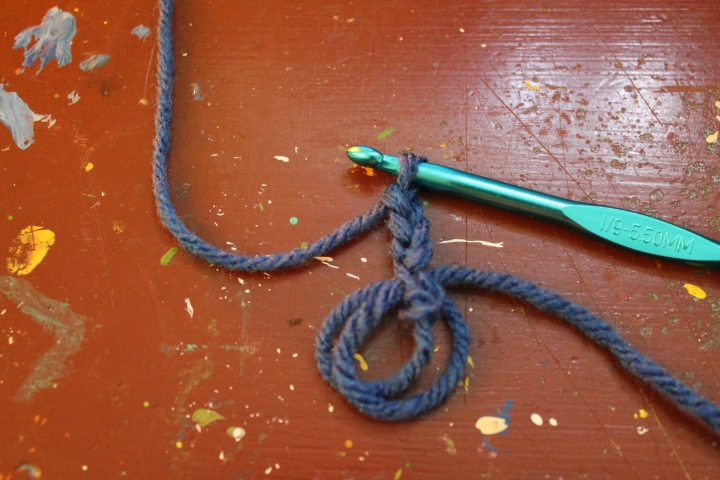
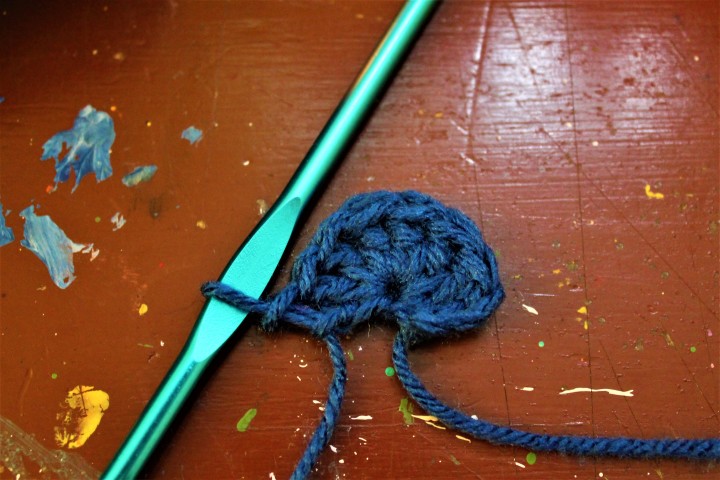
Turn over your work so that the stitches that you just did are facing away from you.
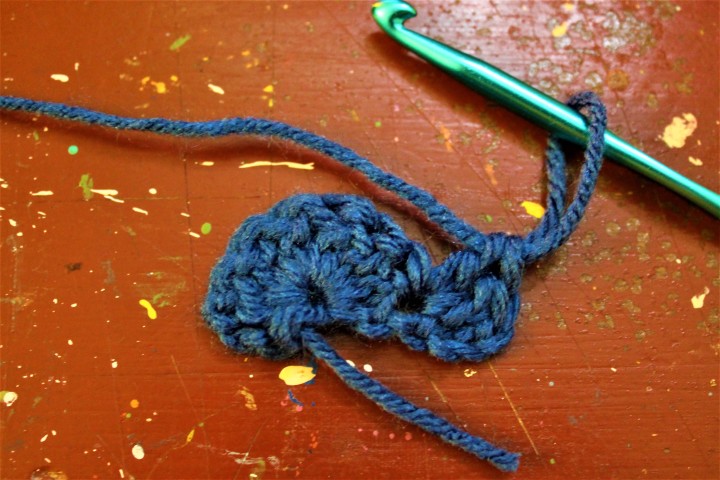
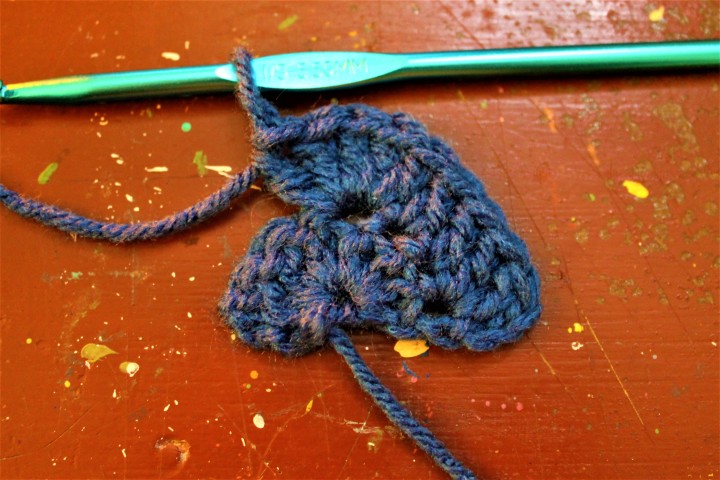
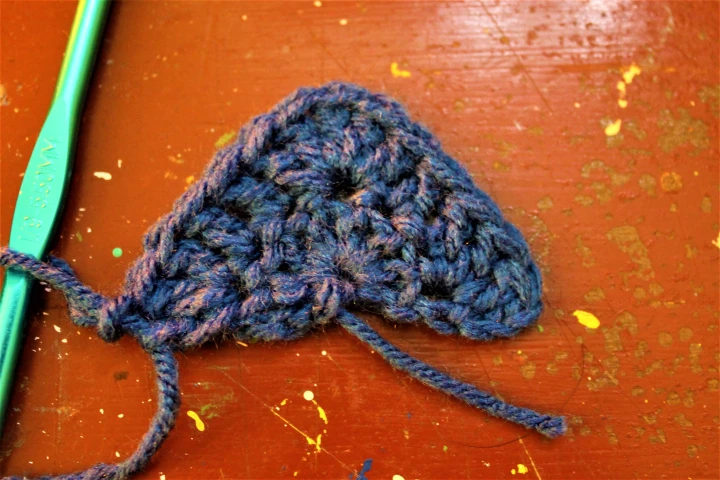
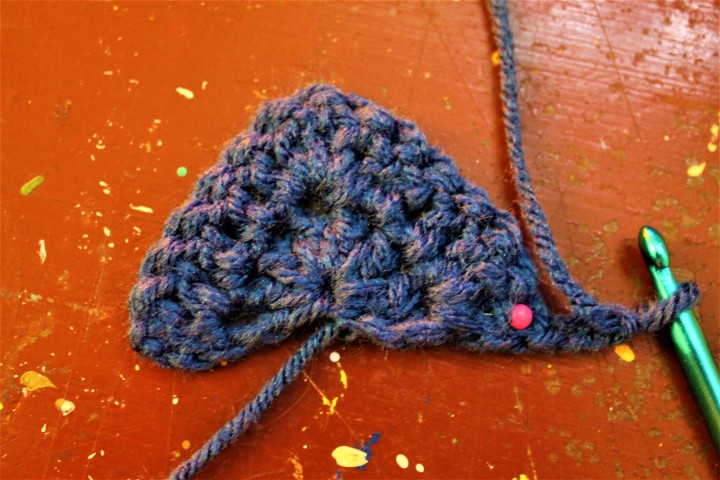
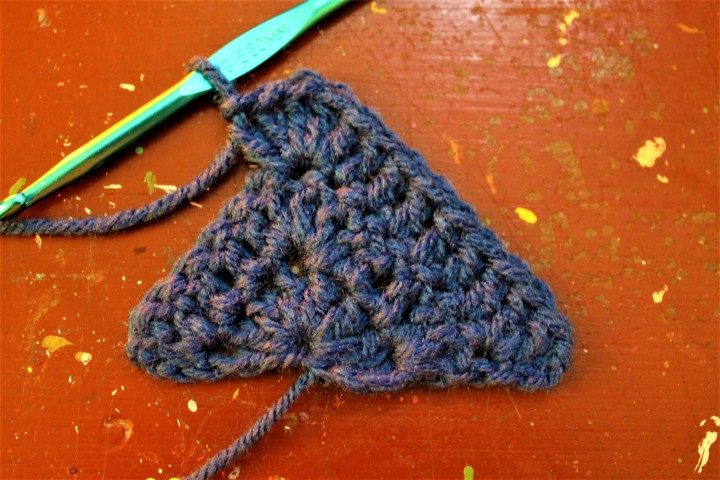
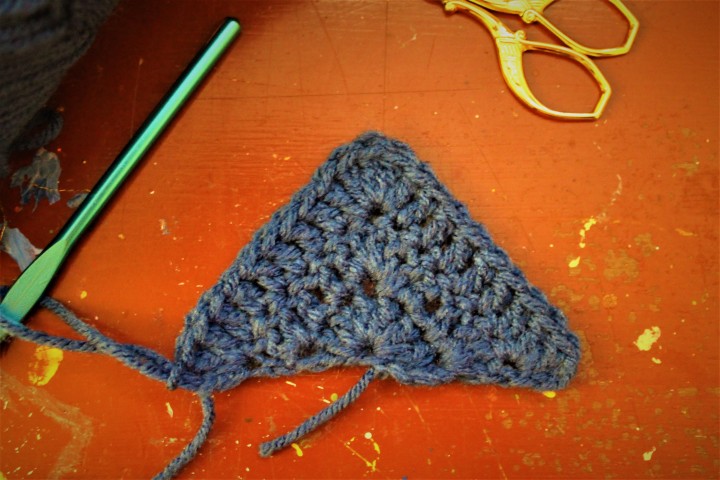
Continue with the same pattern until you reach your desired size!
**Don’t forget to turn your work at the end of each round**
**The pattern will remain the same for each round except that the amount of stitches in between the corners will increase by four stitches each time. (Two stitches are added to each corner per round and four stitches are added to the top corner in each round.)**
If you need help with any of the steps, or if you would like to share your own granny triangle creations please leave a comment below!
Happy Crafting!
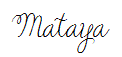

Hello fellow crafters!
Ready to learn a SUPER easy granny square? Most crochet addicts start their addiction with the simple (yet attractive!) granny square. You can make practically anything out of squares; blankets, bags, pillows, even clothes!
Not only are they extremely versatile, but a huge variety of granny squares only require basic stitches which is why they are the perfect project to boost a beginner’s confidence!
This particular square is called a solid granny square because of the simple fact that it barely has any holes which you can see through. That is why it is the perfect square for clothes or bags without needing to add a liner to your finished project!
DC = double crochet ch = chain stitch
First off, you will need to make a magic circle! It’s very simple and ensures that the center of your granny square will not have a hole (don’t forget we are making a SOLID granny square!)


Start by wrapping your yarn around your finger 3 times.
Slide your hook under the first two loops. Hook onto the third loop and pull it through the first two loops.
Gently slide the loops off of your finger and create one slip stitch.
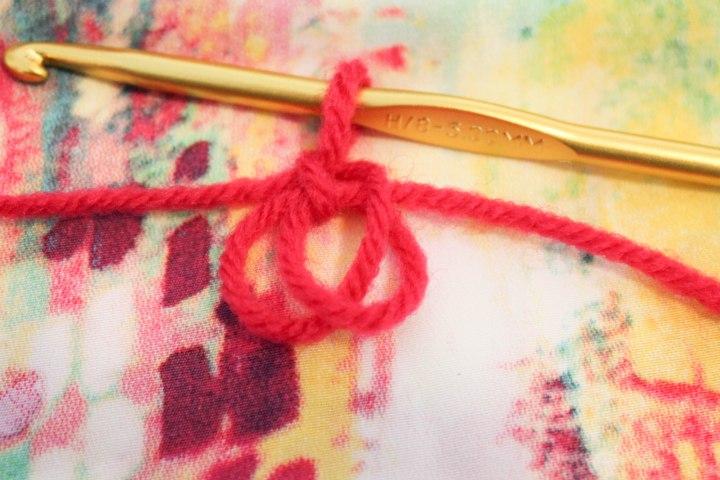
You just made a magic circle! Now we start making our granny square.

**This chain 3 will count as one DC and 1 chain stitch**
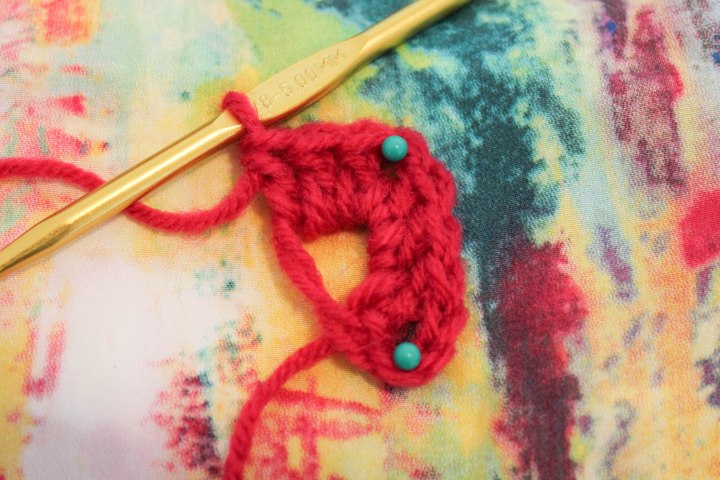
The green dots indicate where your chain 1 spaces should be.

Now the first round of your granny square is complete but we still need to close the magic circle.
To close the magic circle:


Pull the loose end of your yarn (first photo). One of the two loops of your magic circle will start to tighten. Grab that loop! Pull on it until the other loop disappears (second photo).
Then pull the loose end of the yarn that you pulled in the first step until the center of your circle is completely closed!
That’s it!

**3rd chain stitch is marked with a white dot**

ROUND 2
Time to start the second round! Don’t worry, if you figured out the magic circle then the rest of this pattern will be a breeze!


Now you are at the corner space. In each corner you will need to (2DC, CH1, 2DC)
Continue around. DC into the top of each DC stitch and repeat the corner pattern from above whenever you reach a corner!

That’s how you complete the simple solid granny square!
Now you can use this granny square however you would like. It is a continuous pattern so you can make it as big or as small as you would like by just adding more rounds!
I would love to hear about your super simple granny square projects in the comments below!
Happy Crafting!

Hello fellow crafters!
I figure I’ll start my blog off with a simple but beautiful crochet stitch that anyone can do!
All you need to make this stitch is basic crochet knowledge (double crochet and chain stitch), some beautiful yarn, and inspiration for how you want to use it!
I used this particular pattern to make pillows for an old, extremely uncomfortable wooden chair. But it would make a great potholder or a beautiful blanket that would work up super quickly! I would love to hear about what you’re creating with this tutorial in the comments section!
Let’s begin!!
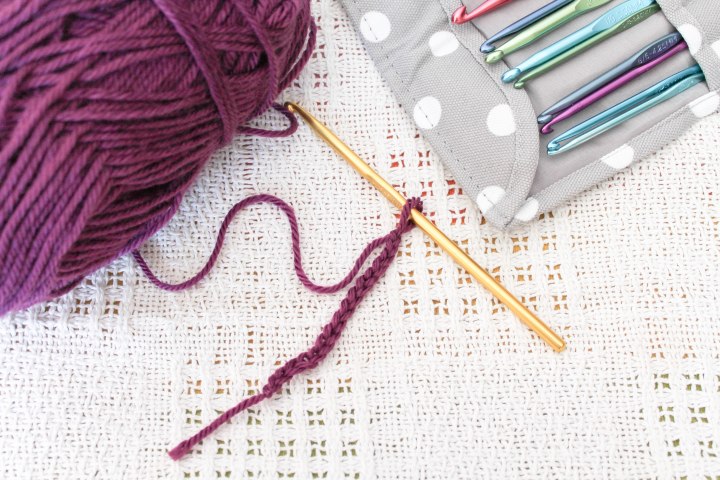
I did 16 chain stitches.
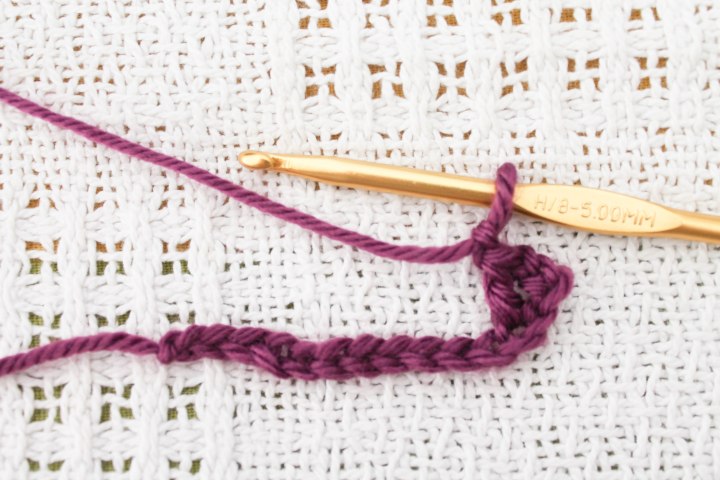
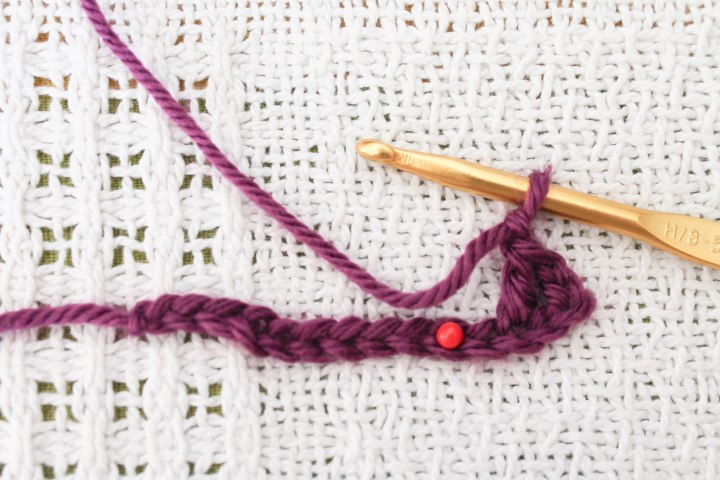
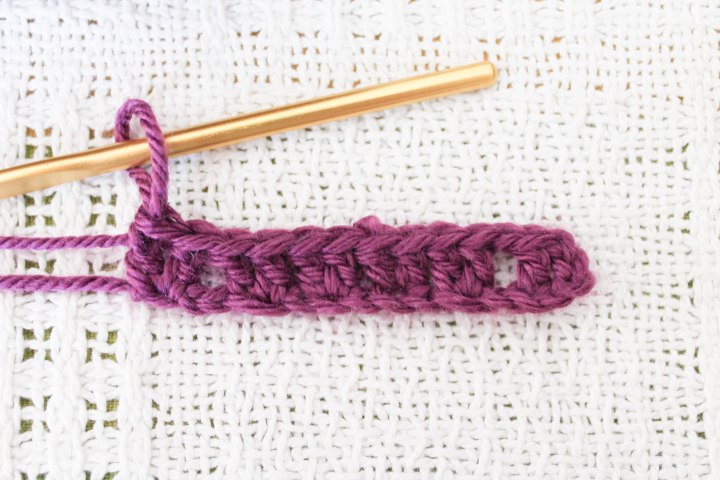


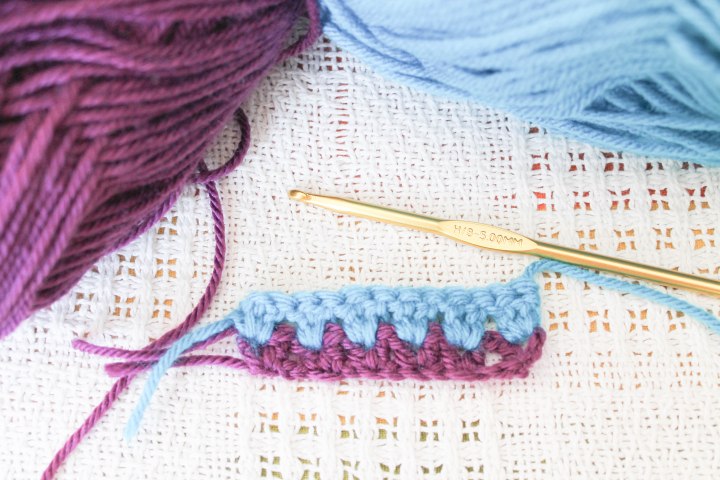
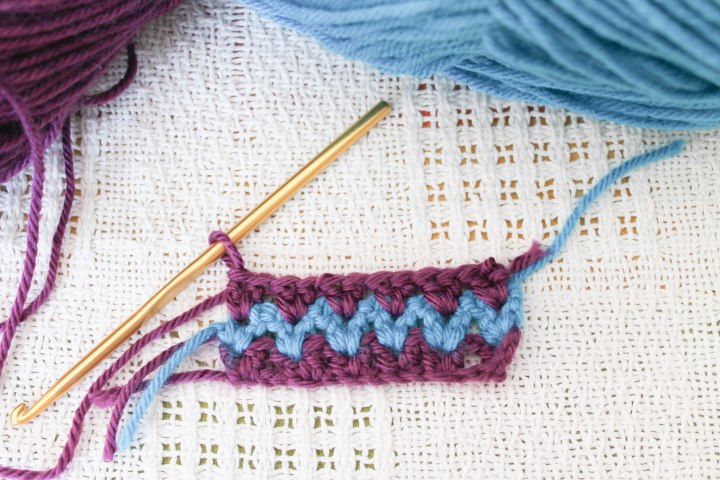
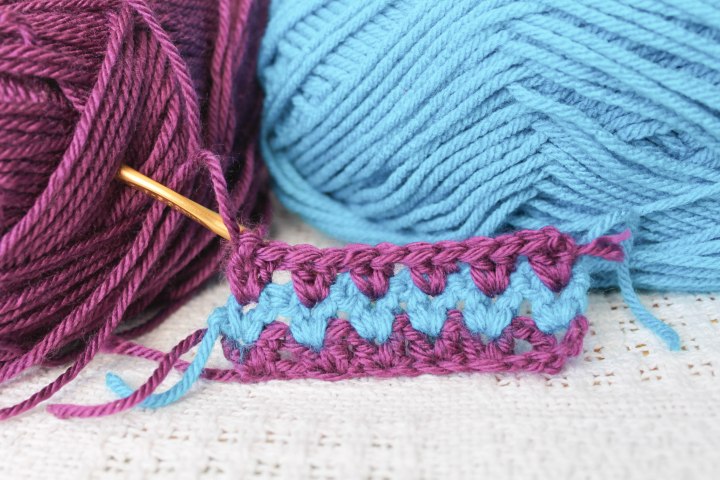
There you have it!
With this pattern it’s very easy to be creative! You can use all one colour to make a nice textured look. Use just two contrasting colours to make more of eye-catching zigzag, or even alternate colours every row to make a crazy colourful creation!
Use this pattern however you want and feel free to post your creations into the comments below or ask me any questions if you find yourself getting stuck on any of the steps!
Happy Crafting!


